c#

Alexa Skills with ASP.NET Core – Porting Reindeer Games

Making a custom Alexa skill is surprisingly easy, especially with the samples available from Amazon. I recently took the opportunity to port the NodeJS Reindeer Games project to .NET, and at the same time improve the code to something a little more readable and maintainable.

I’ve put the code up on my GitHub here: https://github.com/danclarke/ReindeerGamesNetCore

There’s a project for both a Web Service hosted on Azure and a Lambda Function hosted on AWS.

Hosting-wise a Lambda Function is easily the preferred solution simply due to latency. Calls from Alexa to an AWS Lambda are much faster than leaving the data centre and calling your remote web service.

If you do need to create a web service it must be SSL secured. This is easy in production, but a little harder during development. To make this easier, you might want to use something like Caddy with Let’s Encrypt.

Posted by Dan in Alexa, 0 comments

Read-Only Public Properties / State in C#

There are a few ways you may choose to implement a read-only property in C#. Some options are better than others, but how do you know which is the best? Let’s take a look at what you could potentially use and what the pros/cons are:

Naive approach

public class Reader
{
    private string _filename = "Inputfile.txt";

    public string Filename { get { return _filename; } }
}

At first glance, the code above should be ideal. It gives you an explicitly read-only property and correctly hides the internal backing variable. So, what’s wrong?

Internal variable is visible, as well as the property

This makes the code a little more brittle to changes. In the implementation for Reader, developers could use either _filename or the property Filename. If in the future, the code was amended to make the Filename property virtual, all usages of _filename would be immediate bugs. You always want the code to be as resilient as possible. Of course, you should always use the property in code, but mistakes are very easy to make and overlook. It’s much better to make it impossible to write incorrect code – ensuring you end up in the pit of success.

_filename is mutable!

While the property itself is read-only, the backing variable is mutable! Our implementation of Reader is free to change the property as much as it likes. This might be desirable, but generally, we want the state to be as fixed as possible.

Better approach, but not ideal

public class Reader
{
    private const string _filename = "Inputfile.txt";

    public string Filename => _filename;
}

The property accessor is now more concise, and the backing store is read-only. This is good, but it could be better.

Use of const is risky

What? const is risky? In this case, it could be. Const works by substituting all uses of the variable with the explicit value directly into the bytecode at compilation time. This means const is super-fast because there’s no memory usage and no memory access. The drawback is if the const value is changed, but an assembly referencing this assembly isn’t re-compiled. If this happens the other assembly will still see the ‘old’ value. In this example, this could happen if another assembly extended the Reader class it wouldn’t see changes to the private const variable unless it was also re-compiled. To make it even more confusing – it would likely ‘see’ the changes with Debug builds, but not with Release builds. The simple fix to this const difficulty is to use readonly instead of const for values that could change, such as settings. Genuine constants, such as PI, should remain as const.

Better again, but still not ideal

public class Reader
{
    private static readonly string _filename = "Inputfile.txt";

    public string Filename => _filename;
}

The code is getting a little more reliable here. The filename state variable is now static readonly so it’s memory usage is low, while still offering flexibility to changes – even if consuming assemblies aren’t recompiled with every change we make to our assembly.

As an aside, read-only state variables should be static wherever possible. If the variable isn’t static, it’ll be created and initialised with every single instance of the class – rather than just once across all instances.

Ideal approach

public class Reader
{
    public string Filename { get; } = "Inputfile.txt";
}

This is the best solution possible because it gives us maximum flexibility, with the minimum amount of potential issues going forward.

Good Locality

The initialisation happens with the property declaration ensuring high code locality. Before the property could be in a completely different area of the code file to the actual implementation of the private backing state.

No access to backing variable / state

The backing variable is now hidden from us, so we can’t accidentally use it instead of the property. If we make the property virtual, we can’t accidentally use the backing variable by mistake elsewhere in the code.

Easy to change to constructor initialisation

We can just remove the initialiser and put initialisation into the constructor. The property is still read-only, and the backing variable is still invisible. Easy!

Posted by Dan in C#, Programming, 0 comments

Aquiss Broadband Usage Checker for Mac OSX

I’ve been sitting on this for far too long – it’s about time I released it into the wild! After blowing through my usage, my ISP (Aquiss) told me of an undocumented webservice I could use to fetch usage information. Since I was in the middle of a lot of iOS development, I knocked together a Mac app using MonoMac so I could keep track of the usage easily. I really wanted to add some additional functionality, such as logging of usage over time and a little graphing – unfortunately I haven’t been able to find the time to implement these features. Hopefully some time in the future!

Aquiss Usage Checker - Usage Screen

The app is relatively simple, you run it, provide it with your unique hashcode and the app will do the rest. The icon in the menu bar starts out green, and gradually turns red as you approach your limit. It also notifies you at 75% and 95% usage with a popup message box.

Aquiss Usage Checker - Menu Bar Icon

I’ve released the app as a complete opensource project under the GPL license, you can grab the source over at GitHub. When I get a high-res logo from Aquiss I’ll be able to release a binary, as well as a version to the AppStore. I don’t know how many Mac customers Aquiss have, but I hope all 1-10 of them find the app useful.

Posted by Dan in C#, Mac, Mac, 0 comments

Using the Keychain in MonoMac

The keychain is a great feature in OS X, allowing you to store passwords securely. In this tutorial I’ll outline how to store passwords in the keychain so your apps don’t have to worry about securely storing the passwords themselves.

Before I start, you can skip straight to the code on github here.

A few pointers

The MonoMac binding of the OS X keychain is somewhat basic at this moment in time, however it should be enough for basic password storage. OS X supports multiple keychains, as well as multiple types of passwords. At the moment the MonoMac bindings limit you to the system (well, user’s login) keychain, and only the ‘Internet Password’ keychain type.

Additionally you’ll want to sign your app to ensure your passwords are uniquely identified, without signing I’ve noticed that other MonoMac apps authored by myself seem to conflict with each other.

Relevant Classes

We store keychain records in a class of SecRecord, while the SecKeyChain static class handles the interaction with the keychain itself. When searching for records, you’ll fill in a SecRecord with the fields you need to match, then get SecKeyChain to return a matching record. You need to be careful not to try and insert duplicate records, if you do it’ll be difficult to pull out the record you want – it’s undefined which one you’ll get. This can lead to odd bugs where one second you get the correct password, and the next you get the wrong one.

The password for Internet Passwords is stored in the ValueData property, this is of NSData type rather than the string you’re probably expecting.

Selecting

To fetch a record, you need to provide a record with the fields you want to filter by set. At a minimum you’ll want to specify the service and account (username):

var searchRecord = new SecRecord(SecKind.InternetPassword)
{
    Service = ServiceName,
    Account = username
};

SecStatusCode code;
var data = SecKeyChain.QueryAsRecord(searchRecord, out code);

if (code == SecStatusCode.Success)
    return data;
else
    return null;

This code will return a matching record, or NULL if none are found. If more than one record matches your search criteria, you’ll get a random record. For this reason make sure you never accidentally insert duplicate records, or you’ll get unpredictable behaviour in your app. Remember, the search record you specify will be used as the search criteria – the filled in fields will be used for the search.

To get the password from the record use the following code:

password = NSString.FromData(record.ValueData, NSStringEncoding.UTF8);

Remember, the ValueData property is NSData, not a string. If MonoMac allows you to use a record type of ‘Generic Password’, the password will be stored in the Generic property rather than ValueData. Generic is also an NSData type.

Inserting

Inserting a password involves filling out a SecRecord, and then calling Add() on SecKeyChain:

var record = new SecRecord(SecKind.InternetPassword)
{
    Service = ServiceName,
    Label = ServiceName,
    Account = username,
    ValueData = NSData.FromString(password)
};

SecKeyChain.Add(record);

However, if you remember from earlier – you never want to insert a record without checking for an existing one because you’ll risk adding a duplicate record. Once inserted, you’ll see your password in the keychain utlity:
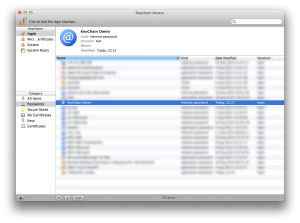
For code on how to perform a check and then update / insert as necessary, check the sample code.

Updating

Updating involves sending in the existing record (or at least one that’ll uniquely identify the record you’re after), and a new record to replace it:

record.ValueData = NSData.FromString(password);
SecKeyChain.Update(searchRecord, record);

The first parameter is handled in exactly the same was as when querying for an existing record, the second parameter is your newly updated record.

Deleting

Deleting is remarkably similar to updating, except you only send in your search record:

var searchRecord = new SecRecord(SecKind.InternetPassword)
{
    Service = ServiceName,
    Account = username
};

SecKeyChain.Remove(searchRecord);

Finishing Up

This guide has demonstrated how to interact with the OS X keychain using MonoMac. Make sure to check out the sample project for a simple utility class that wraps up all of the necessary functionality with a friendly interface.

Posted by Dan in C#, Mac, Tutorials, 2 comments

wait_fences: failed to receive reply: 10004003

This error is cryptic and can have any number of causes, but the most common are:

  • Performing animations when the view isn’t on screen (use viewDidAppear, not viewWillAppear)
  • Failing to call super when overriding a method
  • Calling something in the UI from a thread other than the main UI one
  • Calling UI methods that dramatically change the view (such as presenting / hiding main views) too quickly
  • Calling UI methods before an alert has been dismissed

Basically the error is related to the UI. The message appearing in the output may not reflect the code that actually triggered it – so to debug you need to isolate the code that’s causing it. Your first port of call should be callbacks from alerts, or other popups. For me it was the UIImagePicker, I fixed it like so:

protected void FinishedPickingMedia(object sender, UIImagePickerMediaPickedEventArgs e)
{
    var picker = sender as UIImagePickerController;

    if (picker == null)
        return;

    picker.DismissModalViewControllerAnimated(true);
    if (picker == _picker)
	_picker = null;

    // Work with the image here

    // Bug fix for fences issue
    BeginInvokeOnMainThread(() =>
    {
        // CODE THAT INTERACTS WITH THE UI HERE
    });
}

The pertinent code is the BeginInvokeOnMainThread block, this is fixing the wait_fences issue. It looks like the callback method isn’t being executed on the UI thread. I’m not sure if this is an iOS SDK thing, or a quirk added by MonoTouch. It could also be that the picker is still animating away when I start tweaking the UI, causing the issue. For example messing about with the UI in the Clicked event of a UIAlertView can sometimes cause minor issues, moving the code to the Dismissed event fixes the issues completely.

Posted by Dan in C#, iOS, MonoTouch, 0 comments

Using UIGestureRecognizer in MonoTouch

Gesture Recognisers are a great feature added in iOS 3.2 (ages ago!), and using them in MonoTouch couldn’t be simpler. I’ll skip over a discussion on how they work, if you want more info on the recognisers themselves, be sure to check out the Apple documentation.

Selectors

UIGestureRecognizer instances use selectors to call back methods in your class. Selectors are supported in MonoTouch, you just need to do a little more work:

[Export("ViewTapSelector")]
protected void OnViewTapped(UIGestureRecognizer sender)
{
    MessageLabel.Text = "View Tapped";
}

Essentially you need to create a method, then mark it for export. This tells the MonoTouch compiler to make the method callable by ObjC code. Make sure the containing class is decorated with the Register attribute (ViewControllers are automatically registered).

First Recogniser

Setting up a UIGestureRecognizer is very easy:

var tapRecogniser = new UITapGestureRecognizer(this, new MonoTouch.ObjCRuntime.Selector("ViewTapSelector"));
View.AddGestureRecognizer(tapRecogniser);

This creates a new recogniser, with a callback and assigns it to the root view for the controller. You don’t need to worry about garbage collection since the view will retain the recogniser. You can access all of the recognisers for a view by using the GestureRecognizers property.

That’s it!

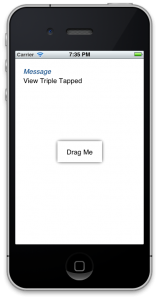
Surprisingly that’s all there is to it! You can download an example project here, or just view the code snippet below to flesh out the principles:

Sample Code

private void SetupGestureRecognisers()
{
    var tapRecogniser = new UITapGestureRecognizer(this, new MonoTouch.ObjCRuntime.Selector("ViewTapSelector"));
    View.AddGestureRecognizer(tapRecogniser);

    var doubleTapRecogniser = new UITapGestureRecognizer(this, new MonoTouch.ObjCRuntime.Selector("ViewDoubleTapSelector"));
    doubleTapRecogniser.NumberOfTapsRequired = 3;
    View.AddGestureRecognizer(doubleTapRecogniser);

    var longPressRecogniser = new UILongPressGestureRecognizer(this, new MonoTouch.ObjCRuntime.Selector("LongPressSelector"));
    View.AddGestureRecognizer(longPressRecogniser);

    var panRecogniser = new UIPanGestureRecognizer(this, new MonoTouch.ObjCRuntime.Selector("LabelPanSelector"));
    DragLabel.AddGestureRecognizer(panRecogniser);
}

[Export("ViewTapSelector")]
protected void OnViewTapped(UIGestureRecognizer sender)
{
    MessageLabel.Text = "View Tapped";
}

[Export("ViewDoubleTapSelector")]
protected void OnViewDoubleTapped(UIGestureRecognizer sender)
{
    MessageLabel.Text = "View Triple Tapped";
}

[Export("LongPressSelector")]
protected void OnLongPress(UIGestureRecognizer sender)
{
    MessageLabel.Text = "View Long Pressed";
}

[Export("LabelPanSelector")]
protected void OnLabelPan(UIGestureRecognizer sender)
{
    var panRecogniser = sender as UIPanGestureRecognizer;

    if (panRecogniser == null)
        return;

    switch (panRecogniser.State)
    {
        case UIGestureRecognizerState.Began:
            _originalPosition = DragLabel.Frame.Location;
            break;

        case UIGestureRecognizerState.Cancelled:
        case UIGestureRecognizerState.Failed:
            DragLabel.Frame = new RectangleF(_originalPosition, DragLabel.Frame.Size);
            break;

        case UIGestureRecognizerState.Changed:
            var movement = panRecogniser.TranslationInView(View);
            var newPosition = new PointF(movement.X + _originalPosition.X, movement.Y + _originalPosition.Y);
            DragLabel.Frame = new RectangleF(newPosition, DragLabel.Frame.Size);
            break;
    }
}
Posted by Dan in C#, iOS, MonoTouch, Tutorials, 4 comments

Converting Float/Single To Network Order And Back In C#

I’ve seen a few posts & threads around the Internet about network order (aka big-endian) and floating point values in C#. First – all binary values are affected by the underlying architecture – this includes floating point values. It’s akin to Hebrew – all the words are written right-to-left, not just some. Now that we’ve cleared that up, I’m sure you’re wondering just how we reverse the ‘endianness’ of floats given that IPAddress only lets you convert ints.

A 32bit int is merely 32 bits of data. We just label it as an ‘int’ and always interpret it thus. What we need to do, is take a 32bit float and pretend it’s an int, get C# to convert it, then send it down the network pipe. The receiver can then fix the endianness and read it as a float. I’ve written some code that does just that:

/// <summary>
/// Convert a float to network order
/// </summary>
/// <param name="host">Float to convert</param>
/// <returns>Float in network order</returns>
public static byte[] HostToNetworkOrder(float host)
{
    byte[] bytes = BitConverter.GetBytes(host);

    if (BitConverter.IsLittleEndian)
        Array.Reverse(bytes);

    return bytes;
}

/// <summary>
/// Convert a float to host order
/// </summary>
/// <param name="network">Float to convert</param>
/// <returns>Float in host order</returns>
public static float NetworkToHostOrder(int network)
{
    byte[] bytes = BitConverter.GetBytes(network);

    if (BitConverter.IsLittleEndian)
        Array.Reverse(bytes);

    return BitConverter.ToSingle(bytes, 0);
}

Remember Network Order is always big-endian. .NET itself can be big-endian or little-endian depending on the underlying architecture. For this reason we always check if we even need to perform a conversion by checking if we’re running on a little-endian system. As an aside Java is always big-endian, regardless of the underlying architecture it’s running on.

Posted by Dan in C#, Guides, 1 comment

NLipsum for Windows Phone 7 (Auto Generate Lorem Ipsum For WP7)

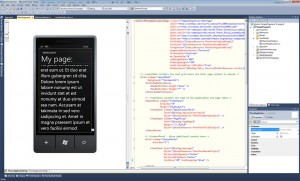
While developing a Silverlight WP7 app, it’s often handy to display demo content in design view so you have an idea of how real content will look. This is one of the biggest advantages of the MVVM architecture – separate data for design and runtime, as demonstrated below:

Fortunately Alex Pendleton has created a Lorem Ipsum generator in .NET 2.0 called NLipsum. Unfortunately it doesn’t work directly on WP7 without a little massaging. Fear not, for I have done the work for you! You can download the project files here, or the binary here.

The dll contains some raw XML files for generating the lipsums, and these are loaded at runtime. For this reason it’s best not to have the binary included with release builds of your app, lest you get a slower startup and increased memory usage. I’ve put in some caching that should mean you can call the generator as much as you like without worrying too much about performance. To use the generator, include it into your project and import the namespace:

using NLipsum.Core;

Then, it’s a simple case of calling the generator to do your bidding:

return LipsumGenerator.Generate(1, Features.Paragraphs, null, Lipsums.LoremIpsum);

return LipsumGenerator.Generate(1, Features.Sentences, null, Lipsums.TheRaven);

return LipsumGenerator.Generate(2, Features.Words, null, Lipsums.LeMasque);

If the content doesn’t show in design view, try re-building your app. This will refresh your design-time databinding as well as bringing in any changes you’ve made to the model (such as adding the lorem ipsum).

Posted by Dan in C#, Windows Phone, 1 comment