Mac

Aquiss Broadband Usage Checker for Mac OSX

I’ve been sitting on this for far too long – it’s about time I released it into the wild! After blowing through my usage, my ISP (Aquiss) told me of an undocumented webservice I could use to fetch usage information. Since I was in the middle of a lot of iOS development, I knocked together a Mac app using MonoMac so I could keep track of the usage easily. I really wanted to add some additional functionality, such as logging of usage over time and a little graphing – unfortunately I haven’t been able to find the time to implement these features. Hopefully some time in the future!

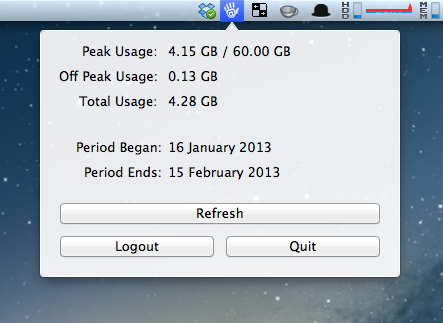
Aquiss Usage Checker - Usage Screen

The app is relatively simple, you run it, provide it with your unique hashcode and the app will do the rest. The icon in the menu bar starts out green, and gradually turns red as you approach your limit. It also notifies you at 75% and 95% usage with a popup message box.

Aquiss Usage Checker - Menu Bar Icon

I’ve released the app as a complete opensource project under the GPL license, you can grab the source over at GitHub. When I get a high-res logo from Aquiss I’ll be able to release a binary, as well as a version to the AppStore. I don’t know how many Mac customers Aquiss have, but I hope all 1-10 of them find the app useful.

Posted by Dan in C#, Mac, Mac, 0 comments

CIFilters with MonoMac

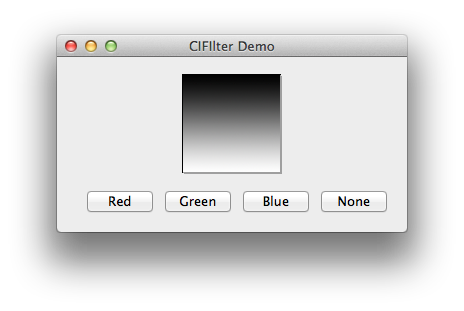
In a recent project I found I needed to colourise (colorize to you Americans!) a greyscale image. Fortunately Apple have built-in support for various colour filters, including the multiply filter I needed. Unfortunately CoreImage only works on CoreImage images, not NSImages – and there’s no easy way to convert between the two.

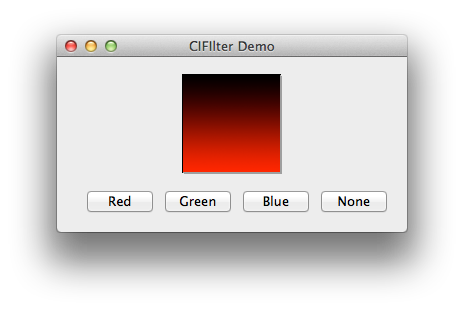
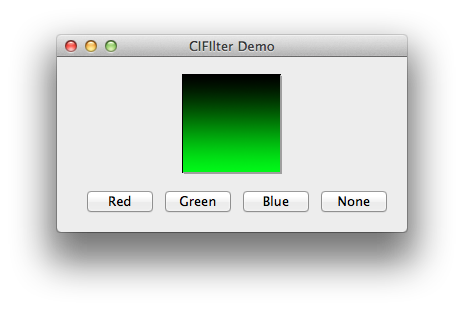
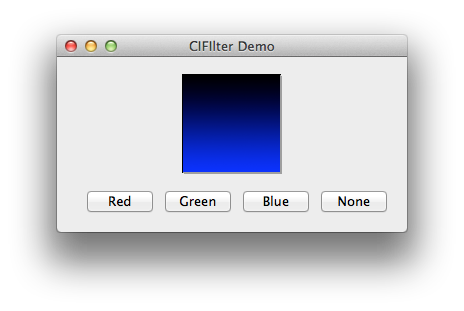
Original ImageRed TintGreen TintBlue Tint

Converting from CIImage to NSImage

Fortunately with Extension Methods, converting a CIImage to an NSImage isn’t too hard:

public static NSImage ToNSImage(this CIImage image)
{
	return ToNSImage(image, image.Extent.Size);
}

public static NSImage ToNSImage(this CIImage image, SizeF size)
{
	var imageRep = NSCIImageRep.FromCIImage(image);
	var nsImage = new NSImage(size);
	nsImage.AddRepresentation(imageRep);

	return nsImage;
}

First we get an NSCIImageRep instance from the CIImage – NSCIImageRep is a class that can render a CIImage. Next we create our new NSImage and use the AddRepresentation method to populate the NSImage with the CIImage. Internally the NSCIImageRep instance will render the CIImage to memory in a bitmap format, NSImage will then populate itself with this bitmap.

Tinting the Greyscale image with CoreImage

Now we don’t need to worry about using CIImages with abandon we can focus on the actual tinting. We need to load in our image, then we need to create a tint image, finally we need to multiply the two together just like in Photoshop. Let’s load in our graphics first:

var mainImage = CIImage.FromUrl(NSUrl.FromFilename(NSBundle.MainBundle.PathForResource(
	Path.GetFileNameWithoutExtension(ImagePath), Path.GetExtension(ImagePath))));
var tintImage = CIImage.ImageWithColor(CIColor.FromRgb(1f, 0f, 0f));

We load in the image using FromUrl here since it’s the most efficient manner. If we loaded in via an NSImage, we would be wasting memory in both the load and conversion process – better to load from the file system directly. If you need to use the same image repeatedly, load in the image as a byte array and create an instance of CIImage using the data.  Next we create our filter:

var filter = CIFilter.FromName("CIMultiplyCompositing");

Unfortunately MonoMac doesn’t contain strongly typed bindings for any CoreImage filters, so we need to populate the input parameters using Key-Value Coding:

filter.SetValueForKey(tintImage, (NSString)"inputImage");
filter.SetValueForKey(mainImage, (NSString)"inputBackgroundImage");

We need to cast here because Key-Value coding requires NSString instances. NSString has an implicit conversion operator for string, allowing us to cast string directly to NSString. Note the key names, these must match exactly, each filter has different parameters – a reference for all filter types and their parameters is available here. Now we can perform the tint and display the result:

var processedImage = (CIImage)filter.ValueForKey((NSString)"outputImage");
var outputImage = processedImage.ToNSImage();

ImageView.Image = outputImage;

And that’s it! If the filter fails for any reason ValueForKey will return NULL. The code above will apply a red tint and you should get something like:

Red Tint

Posted by Dan in C#, Guides, Mac, Mac, 0 comments

Using the Keychain in MonoMac

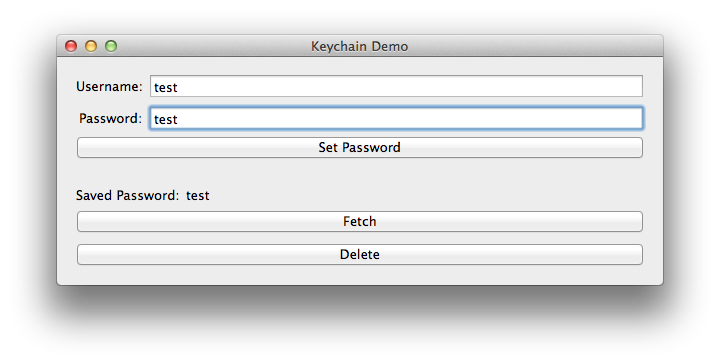
The keychain is a great feature in OS X, allowing you to store passwords securely. In this tutorial I’ll outline how to store passwords in the keychain so your apps don’t have to worry about securely storing the passwords themselves.

Before I start, you can skip straight to the code on github here.

A few pointers

The MonoMac binding of the OS X keychain is somewhat basic at this moment in time, however it should be enough for basic password storage. OS X supports multiple keychains, as well as multiple types of passwords. At the moment the MonoMac bindings limit you to the system (well, user’s login) keychain, and only the ‘Internet Password’ keychain type.

Additionally you’ll want to sign your app to ensure your passwords are uniquely identified, without signing I’ve noticed that other MonoMac apps authored by myself seem to conflict with each other.

Relevant Classes

We store keychain records in a class of SecRecord, while the SecKeyChain static class handles the interaction with the keychain itself. When searching for records, you’ll fill in a SecRecord with the fields you need to match, then get SecKeyChain to return a matching record. You need to be careful not to try and insert duplicate records, if you do it’ll be difficult to pull out the record you want – it’s undefined which one you’ll get. This can lead to odd bugs where one second you get the correct password, and the next you get the wrong one.

The password for Internet Passwords is stored in the ValueData property, this is of NSData type rather than the string you’re probably expecting.

Selecting

To fetch a record, you need to provide a record with the fields you want to filter by set. At a minimum you’ll want to specify the service and account (username):

var searchRecord = new SecRecord(SecKind.InternetPassword)
{
    Service = ServiceName,
    Account = username
};

SecStatusCode code;
var data = SecKeyChain.QueryAsRecord(searchRecord, out code);

if (code == SecStatusCode.Success)
    return data;
else
    return null;

This code will return a matching record, or NULL if none are found. If more than one record matches your search criteria, you’ll get a random record. For this reason make sure you never accidentally insert duplicate records, or you’ll get unpredictable behaviour in your app. Remember, the search record you specify will be used as the search criteria – the filled in fields will be used for the search.

To get the password from the record use the following code:

password = NSString.FromData(record.ValueData, NSStringEncoding.UTF8);

Remember, the ValueData property is NSData, not a string. If MonoMac allows you to use a record type of ‘Generic Password’, the password will be stored in the Generic property rather than ValueData. Generic is also an NSData type.

Inserting

Inserting a password involves filling out a SecRecord, and then calling Add() on SecKeyChain:

var record = new SecRecord(SecKind.InternetPassword)
{
    Service = ServiceName,
    Label = ServiceName,
    Account = username,
    ValueData = NSData.FromString(password)
};

SecKeyChain.Add(record);

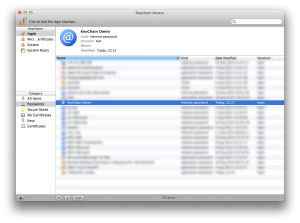
However, if you remember from earlier – you never want to insert a record without checking for an existing one because you’ll risk adding a duplicate record. Once inserted, you’ll see your password in the keychain utlity:

For code on how to perform a check and then update / insert as necessary, check the sample code.

Updating

Updating involves sending in the existing record (or at least one that’ll uniquely identify the record you’re after), and a new record to replace it:

record.ValueData = NSData.FromString(password);
SecKeyChain.Update(searchRecord, record);

The first parameter is handled in exactly the same was as when querying for an existing record, the second parameter is your newly updated record.

Deleting

Deleting is remarkably similar to updating, except you only send in your search record:

var searchRecord = new SecRecord(SecKind.InternetPassword)
{
    Service = ServiceName,
    Account = username
};

SecKeyChain.Remove(searchRecord);

Finishing Up

This guide has demonstrated how to interact with the OS X keychain using MonoMac. Make sure to check out the sample project for a simple utility class that wraps up all of the necessary functionality with a friendly interface.

Posted by Dan in C#, Mac, Tutorials, 2 comments

MonoMac “Exception has been thrown by the target of an invocation” when accessing outlet

If you’re getting a ‘Exception has been thrown by the target of an invocation’ exception when trying to access an outlet variable, it could be the outlet has been hooked up wrong. The outlets must be hooked up to the File Owner, which is most likely to be your controller class. Xcode presented the view rather than the controller in the editor panel, so I had hooked up all of my outlets to the view instead of the controller by accident.

Posted by Dan in Mac, 0 comments

Cocoa Popup window in the Status bar – MonoMac Port

Vadim Shpakovski way back on July 2011 released code for a popup window in the status bar, and now in August 2012 I have ported it over to MonoMac with a few tweaks! If you don’t care about the guide below, you can access the source at Github.

The implementation is largely the same as used in Vadim’s implementation, with a few tweaks to make it simpler, more .NET-like and more extensible. There’s still more work that needs to be done to make it truly modular architecture-wise, but I’ve made the classes themselves easily extensible with clear extension points.

High Level Overview

The entry point is the StatusPanelController, this controller creates the icon in the status bar. It takes in a controller that inherits from PanelController so that you can create your own custom views if necessary. When the user clicks on the icon, the controller will call OpenPanel() and ClosePanel() in the PanelController.

The PanelController is the controller for the panel that opens – it’s responsible for all rendering.

BackgroundView is the background for the panel we display, you can think of it as the panel itself. It renders the arrow, border, and background. For this reason the panel you use must have a BackgroundView, additionally the panel itself should be effectively non-styled, with all standard window chrome removed.

That’s basically it!

BackgroundView

BackgroundView is a special view that represents the popup panel. At the top of the source file are various constants for controlling how the view should be rendered. ArrowX is necessary so that we know where the middle of the status bar icon is. The arrow will centre itself on this point.

To render the view we override DrawRect, and provide our own custom drawing using an NSBezierPath to do most of the work. Take note that the coords .NET use are reversed on the Y axis, .NET’s origin is in the top-left, while OS X’s origin is in the bottom left.

PanelController (and a little note on MonoMac Animation)

PanelController is the most substantial class in the entire project. This controller is responsible for the display of the panel itself, this means it needs to handle the animation of the panel, as well as updating the BackgroundView with the position of the status icon, should the window be resized. HandleWindowDidResize handles the arrow position, updating the BackgroundView whenever the panel is resized. Meanwhile we have two events, WillClose and DidResignKey that we use to know when to close the panel. We don’t want the panel just disappearing, we want a nice smooth animation!

OpenPanel() is responsible for displaying the panel in a smooth way. First of all it works out the position the panel needs to be, this is based on the icon position. Next we set up the panel for display by ensuring critical state, and adding a teeny bit of a debug Easter egg. If you press shift, or shift + option, you slow down the animation, and optionally output debug information relating to the upcoming display.

Finally we animate the panel into view. Note that we cast the Animator property of the window, this is because by default the Animator property is of type NSObject. The Animator is actually a proxy for the full object, so we can just cast it to the ‘real’ type, and set our new post-animation properties. We then finish our animations, and let OS X do the rest!

ClosePanel() is the opposite of OpenPanel() and just animates the panel away.

Panel

Panel is a very slightly customised implementation of NSPanel. We just add an extra property so that we can use controls in the panel that require the keyboard, such as text fields.

StatusItemView

This is the view that will be displayed in the status bar. It’s fairly self-explanatory, with different images depending on the state of the button. There’s a GlobalRect property so that we can locate the icon in the screen and position the panel.

For rendering we override DrawRect, and do it largely ourselves. We first draw the background into the view, optionally highlighted. Next we draw the requisite image (the icon) in the centre of the view. We use an updated method call over the one used by Vadim because the original has been deprecated – it’s not even available in MonoMac!

Finally we track the MouseDown and MouseUp events, rather than just MouseUp. A ‘click’ is considered when the user both mouses down and up, in the same view. If the user does this, we fire the StatusItemClicked event.

StatusPanelController

Finally we have the controller that actually brings it all together. The controller could do with a little more work to make it genuinely re-usable, since it uses hard-coded values for the images, as well as the view used for the status icon. Fortunately re-factoring these out into dependencies would be fairly trivial.

At construction we create all of our required controllers and views, this creates the icon in the status bar.

We hook into the clicked event from StatusItemView, and toggle the panel as neccesary.

Finally we implement IDisposable so that we never leave an icon in the status bar by accident – that would be very bad! We also have a finalizer so that no matter what, the icon will end up removed from the status bar when the controller is garbage collected.
Posted by Dan in Mac, Programming, 6 comments