C#

Azure Blob Upload Speed – Don’t use OpenWriteAsync()

Uploading to Azure Storage with the .NET Client can often require some customisation to ensure acceptable performance. First, let’s look at some options in BlobRequestOptions:

SingleBlobUploadThresholdInBytes

The minimum size of a blob before it’ll be uploaded in ‘chunks’. This only works for the non-stream based upload methods.

Minimum: 1MB, or 1,048,576 bytes.

ParallelOperationThreadCount

The maximum number of upload operations to perform in parallel, for a single blob.

There’s also a useful property on the Blob itself:

StreamWriteSizeInBytes

The size of each block to upload. So, for example, if you set to 1MB, a 4MB file will be chunked into 4 separate 1MB blocks.

Default value: 4MB, or 4,194,304 bytes.

// Options
var options = new BlobRequestOptions
{
    SingleBlobUploadThresholdInBytes = 1024 * 1024, //1MB, the minimum
    ParallelOperationThreadCount = 1
};

client.DefaultRequestOptions = options;

// Blob stream write
blob.StreamWriteSizeInBytes = 1024 * 1024;

A more thorough explanation is available here: https://www.simple-talk.com/cloud/platform-as-a-service/azure-blob-storage-part-4-uploading-large-blobs/

When it’s all ignored – OpenWriteAsync()

You can set all of these options, but if you use blob.OpenWriteAsync() it’s going to upload files in 5KB chunks as you write to the stream. This will absolutely destroy performance if you’re uploading larger files or a lot of files. Instead, you’ll need to use the blob.UploadFromStreamAsync() method:

// Buffer to a memory stream so that the client uploads in one chunk instead of multiple
// By default the client seems to upload in 5KB chunks
using (var memStream = new MemoryStream())
{
    // Save to memory stream
    await saveActionAsync(memStream);

    // Upload to Azure
    memStream.Seek(0, SeekOrigin.Begin);
    await blob.UploadFromStreamAsync(memStream);
}

If you use the UploadFromStreamAsync() method, the settings you set will be honoured and blobs will be uploaded in a much more efficient manner.

Posted by Dan in Azure, C#, 3 comments

Read-Only Public Properties / State in C#

There are a few ways you may choose to implement a read-only property in C#. Some options are better than others, but how do you know which is the best? Let’s take a look at what you could potentially use and what the pros/cons are:

Naive approach

public class Reader
{
    private string _filename = "Inputfile.txt";

    public string Filename { get { return _filename; } }
}

At first glance, the code above should be ideal. It gives you an explicitly read-only property and correctly hides the internal backing variable. So, what’s wrong?

Internal variable is visible, as well as the property

This makes the code a little more brittle to changes. In the implementation for Reader, developers could use either _filename or the property Filename. If in the future, the code was amended to make the Filename property virtual, all usages of _filename would be immediate bugs. You always want the code to be as resilient as possible. Of course, you should always use the property in code, but mistakes are very easy to make and overlook. It’s much better to make it impossible to write incorrect code – ensuring you end up in the pit of success.

_filename is mutable!

While the property itself is read-only, the backing variable is mutable! Our implementation of Reader is free to change the property as much as it likes. This might be desirable, but generally, we want the state to be as fixed as possible.

Better approach, but not ideal

public class Reader
{
    private const string _filename = "Inputfile.txt";

    public string Filename => _filename;
}

The property accessor is now more concise, and the backing store is read-only. This is good, but it could be better.

Use of const is risky

What? const is risky? In this case, it could be. Const works by substituting all uses of the variable with the explicit value directly into the bytecode at compilation time. This means const is super-fast because there’s no memory usage and no memory access. The drawback is if the const value is changed, but an assembly referencing this assembly isn’t re-compiled. If this happens the other assembly will still see the ‘old’ value. In this example, this could happen if another assembly extended the Reader class it wouldn’t see changes to the private const variable unless it was also re-compiled. To make it even more confusing – it would likely ‘see’ the changes with Debug builds, but not with Release builds. The simple fix to this const difficulty is to use readonly instead of const for values that could change, such as settings. Genuine constants, such as PI, should remain as const.

Better again, but still not ideal

public class Reader
{
    private static readonly string _filename = "Inputfile.txt";

    public string Filename => _filename;
}

The code is getting a little more reliable here. The filename state variable is now static readonly so it’s memory usage is low, while still offering flexibility to changes – even if consuming assemblies aren’t recompiled with every change we make to our assembly.

As an aside, read-only state variables should be static wherever possible. If the variable isn’t static, it’ll be created and initialised with every single instance of the class – rather than just once across all instances.

Ideal approach

public class Reader
{
    public string Filename { get; } = "Inputfile.txt";
}

This is the best solution possible because it gives us maximum flexibility, with the minimum amount of potential issues going forward.

Good Locality

The initialisation happens with the property declaration ensuring high code locality. Before the property could be in a completely different area of the code file to the actual implementation of the private backing state.

No access to backing variable / state

The backing variable is now hidden from us, so we can’t accidentally use it instead of the property. If we make the property virtual, we can’t accidentally use the backing variable by mistake elsewhere in the code.

Easy to change to constructor initialisation

We can just remove the initialiser and put initialisation into the constructor. The property is still read-only, and the backing variable is still invisible. Easy!

Posted by Dan in C#, Programming, 0 comments

ASP.NET Identity 3 with EF is bloated and slow… let’s fix that

Since first using ASP.NET 5 and MVC 6 I’ve been fighting the EF-based Identity framework. I can’t do much about the rather obtuse API, but I can fix the constant moaning about migrations and terrible performance by replacing the EF data stores with something a little (OK a LOT) better. I’m a big fan of the new ‘micro’ ORMs out there like PetaPOCO, Dapper, Massive, etc. They’re extremely easy to use, and incredibly fast – almost as fast as manually typing out ADO.NET commands yourself but without the pain. At work I use NPOCO, which is an extended and in my opinion ‘better’ version of PetaPOCO.

While the API for ASP.NET Identity may be ‘odd’, Microsoft have made it quite easy to extend / change the framework. Removing the hard dependency on Entity Framework is a simple case of replacing the ‘UserStore’ and ‘RoleStore’ with your own implementations. Technically you only have to support the features you’re actually using. But it’s pretty easy to support everything but the ‘Queryable’ functionality, and you do this by implementation various interfaces such as:

  • IUserLoginStore<TUser>
  • IUserRoleStore<TUser>
  • IUserClaimStore<TUser>
  • IUserPasswordStore<TUser>
  • IUserSecurityStampStore<TUser>
  • IUserEmailStore<TUser>
  • IUserLockoutStore<TUser>
  • IUserPhoneNumberStore<TUser>
  • IUserTwoFactorStore<TUser>

Part of the reason the storage API is so over-engineered is so that the system can support both databases and remote services without impacting on performance too much. The disadvantage, ironically, is that performance is slightly lower if you’re using a traditional database as the data store. It also means when using Identity you have to explicitly ask for things, rather than being able to fetch a user and immediately see the available roles for example.

Microsoft have completely open-sourced Identity so you can see the default implementation over at GitHub here. I used this code as the basis for my own implementation. Of particular interest are the UserStore and RoleStore classes in the EntityFramework project.

I’ve open sourced my implementation and made it available on GitHub here. In short you lost almost no functionality, yet gain a staggering performance gain of up to 1,136%. You can easily transition from your current EF version to the new NPOCO version since the DB schema is identical (in fact I’ve just stolen MS’ schema for compatibility purposes). You can still use your own custom user and role classes as long as they inherit from IdentityUser and IdentityRole – just like with the MS EF version.

Posted by Dan in C#, Open Source, 0 comments

Aquiss Broadband Usage Checker for Mac OSX

I’ve been sitting on this for far too long – it’s about time I released it into the wild! After blowing through my usage, my ISP (Aquiss) told me of an undocumented webservice I could use to fetch usage information. Since I was in the middle of a lot of iOS development, I knocked together a Mac app using MonoMac so I could keep track of the usage easily. I really wanted to add some additional functionality, such as logging of usage over time and a little graphing – unfortunately I haven’t been able to find the time to implement these features. Hopefully some time in the future!

Aquiss Usage Checker - Usage Screen

The app is relatively simple, you run it, provide it with your unique hashcode and the app will do the rest. The icon in the menu bar starts out green, and gradually turns red as you approach your limit. It also notifies you at 75% and 95% usage with a popup message box.

Aquiss Usage Checker - Menu Bar Icon

I’ve released the app as a complete opensource project under the GPL license, you can grab the source over at GitHub. When I get a high-res logo from Aquiss I’ll be able to release a binary, as well as a version to the AppStore. I don’t know how many Mac customers Aquiss have, but I hope all 1-10 of them find the app useful.

Posted by Dan in C#, Mac, Mac, 0 comments

CIFilters with MonoMac

In a recent project I found I needed to colourise (colorize to you Americans!) a greyscale image. Fortunately Apple have built-in support for various colour filters, including the multiply filter I needed. Unfortunately CoreImage only works on CoreImage images, not NSImages – and there’s no easy way to convert between the two.

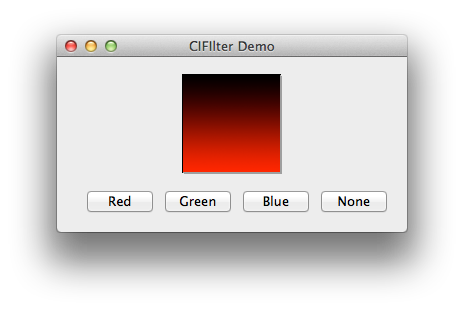
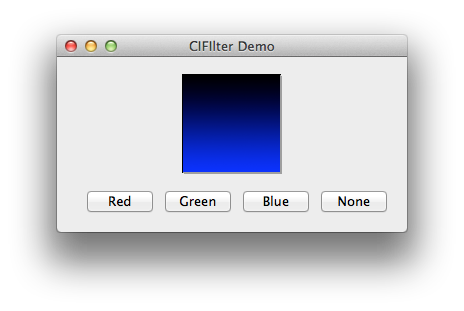
Original ImageRed TintGreen TintBlue Tint

Converting from CIImage to NSImage

Fortunately with Extension Methods, converting a CIImage to an NSImage isn’t too hard:

public static NSImage ToNSImage(this CIImage image)
{
	return ToNSImage(image, image.Extent.Size);
}

public static NSImage ToNSImage(this CIImage image, SizeF size)
{
	var imageRep = NSCIImageRep.FromCIImage(image);
	var nsImage = new NSImage(size);
	nsImage.AddRepresentation(imageRep);

	return nsImage;
}

First we get an NSCIImageRep instance from the CIImage – NSCIImageRep is a class that can render a CIImage. Next we create our new NSImage and use the AddRepresentation method to populate the NSImage with the CIImage. Internally the NSCIImageRep instance will render the CIImage to memory in a bitmap format, NSImage will then populate itself with this bitmap.

Tinting the Greyscale image with CoreImage

Now we don’t need to worry about using CIImages with abandon we can focus on the actual tinting. We need to load in our image, then we need to create a tint image, finally we need to multiply the two together just like in Photoshop. Let’s load in our graphics first:

var mainImage = CIImage.FromUrl(NSUrl.FromFilename(NSBundle.MainBundle.PathForResource(
	Path.GetFileNameWithoutExtension(ImagePath), Path.GetExtension(ImagePath))));
var tintImage = CIImage.ImageWithColor(CIColor.FromRgb(1f, 0f, 0f));

We load in the image using FromUrl here since it’s the most efficient manner. If we loaded in via an NSImage, we would be wasting memory in both the load and conversion process – better to load from the file system directly. If you need to use the same image repeatedly, load in the image as a byte array and create an instance of CIImage using the data.  Next we create our filter:

var filter = CIFilter.FromName("CIMultiplyCompositing");

Unfortunately MonoMac doesn’t contain strongly typed bindings for any CoreImage filters, so we need to populate the input parameters using Key-Value Coding:

filter.SetValueForKey(tintImage, (NSString)"inputImage");
filter.SetValueForKey(mainImage, (NSString)"inputBackgroundImage");

We need to cast here because Key-Value coding requires NSString instances. NSString has an implicit conversion operator for string, allowing us to cast string directly to NSString. Note the key names, these must match exactly, each filter has different parameters – a reference for all filter types and their parameters is available here. Now we can perform the tint and display the result:

var processedImage = (CIImage)filter.ValueForKey((NSString)"outputImage");
var outputImage = processedImage.ToNSImage();

ImageView.Image = outputImage;

And that’s it! If the filter fails for any reason ValueForKey will return NULL. The code above will apply a red tint and you should get something like:

Red Tint

Posted by Dan in C#, Guides, Mac, Mac, 0 comments

Implementing IParcelable in Mono for Android

If you want to pass values between activities in Android, you’ll probably want to implement Parcelable sooner or later. This isn’t particularly slick even when writing natively, but add Mono in and it becomes even murkier. Fortunately .NET’s Generics support helps us out a little. The reason for the rather heavy implementation is intents can cross process boundaries, meaning you can’t just provide a memory address. This gives you the ability to call apps / resources you haven’t programmed yourself, but unfortunately it means inter-activity communication is ‘heavy’ for want of a better term. If you’re thinking of using IParcelable in a brand new app that isn’t going to be receiving 3rd party parcels, consider the ‘alternatives’ at the end of this guide first. IParcelable is somewhat of a convenience API for serialising objects to binary and then de-serialising. You might be better off doing this yourself rather than using the ‘Android’ method.

Our Class

For this demo I want to pass an array of a really simple class:

public sealed class SelectListItem
{
	// Convenience constructors
	public SelectListItem() {}
	public SelectListItem(int id, string name)
	{
		Id = id;
		Name = name;
	}

	// The actual properties for this class
	public int Id { get; set; }
	public string Name { get; set; }
}

Reference ‘Mono.Android.Export’

Before we start, make sure to reference the ‘Mono.Android.Export’ assembly:
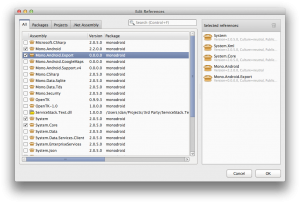
Mono.Android.Export Assembly Reference

Implementing IParcelable

This class will be used to populate a ListActivity with a series of items that can be selected. First we need to inherit from Java.Lang.Object, and implement the IParcelable interface:

public sealed class SelectListItem : Java.Lang.Object, IParcelable

So why do we have to inherit from Java.Lang.Object? The Android runtime needs to be able to call the methods that we define as part of IParcelable, to do this our class must have a dual-personality. One half of the class is .NET, the other half is Java, it is this Java side that Android can see. When a method is called on the Java side, it will execute the .NET code. Clever huh? Unfortunately this means we now have two objects instead of one in memory, it also means that Mono must keep track of both objects. To do this it uses a global ID or reference, this reference links the two instances together. Unfortunately GREFs, are a very, very limited resource. The emulator only supports ~2,000 and devices usually only support ~50,000 GREFs. For more information on GREFs, check the Architecture and Garbage Collection documents over at Xamarin.

Before we implement the interface, we need to add an additional constructor that can accept a Parcel type. This constructor will populate the instance with the values from the parcel – the parcel being the ‘wrapped’ data of an instance of the same type:

// Create a new SelectListItem populated with the values in parcel
private SelectListItem(Parcel parcel)
{
	Id = parcel.ReadInt();
	Name = parcel.ReadString();
}

Note the order we read in the values, this is very important and must mirror the order in WriteToParcel below.

Next we need to implement the interface:

public int DescribeContents()
{
	return 0;
}

// Save this instance's values to the parcel
public void WriteToParcel(Parcel dest, ParcelableWriteFlags flags)
{
	dest.WriteInt(Id);
	dest.WriteString(Name);
}

DescribeContents is used for flagging ‘special objects’ within the parcel. I’ve never had cause to use this field, and 0 means ‘no special objects’.

WriteToParcel is where we write the instance data to the parcel, pay special attention to the order you write the values. This same order must be mirrored when reading in the parcel above. The flags attribute gives additional information on how the data should be written, it’s unlikely you’ll need to check these flags.

The CREATOR field

All Parcelable objects must have a public static field called CREATOR. The instance behind this field is responsible for creating instances of the object and populating them from the parcel. This can be done in two ways, an internal class that is implementation-specific, or a generic class that can be re-used repeatedly. The first method is the method commonly used in Java applications. However, with .NET we gain a much more robust Generics implementation so we’ll go down that route. However if you’re interested in the Java-favoured implementation it’s available in the sample project as a comment.

Without further ado, let’s look at how to declare our creator:

// The creator creates an instance of the specified object
private static readonly GenericParcelableCreator<SelectListItem> _creator
	= new GenericParcelableCreator<SelectListItem>((parcel) => new SelectListItem(parcel));

[ExportField("CREATOR")]
public static GenericParcelableCreator<SelectListItem> GetCreator()
{
	return _creator;
}

First we declare a private static instance, it’s required to be static by the Android API. Because this instance is static, it’s critical that your creator is thread safe otherwise bad things will happen. After the actual instance declaration we create a public static method, and decorate it with the ExportField attribute. Unfortunately this attribute can only be used on methods, so we can’t decorate our field directly. ExportField will ensure the Java version of our class gains a public static field named CREATOR.

A Generic ParcelableCreator Implementation

Earlier I mentioned that when developing with Java, each Parcelable requires a custom creator. Fortunately with .NET we gain a robust Generic implementation and we can use a generic creator that we can use again and again:

public sealed class GenericParcelableCreator<T> : Java.Lang.Object, IParcelableCreator
	where T : Java.Lang.Object, new()
{
	private readonly Func<Parcel, T> _createFunc;

	/// <summary>
	/// Initializes a new instance of the <see cref="ParcelableDemo.GenericParcelableCreator`1"/> class.
	/// </summary>
	/// <param name='createFromParcelFunc'>
	/// Func that creates an instance of T, populated with the values from the parcel parameter
	/// </param>
	public GenericParcelableCreator(Func<Parcel, T> createFromParcelFunc)
	{
		_createFunc = createFromParcelFunc;
	}

	#region IParcelableCreator Implementation

	public Java.Lang.Object CreateFromParcel(Parcel source)
	{
		return _createFunc(source);
	}

	public Java.Lang.Object[] NewArray(int size)
	{
		return new T[size];
	}

	#endregion
}

The creator must also be usable directly by Android, so again we have to inherit from Java.Lang.Object. We add two restrictions to the generic type parameter, first it must inherit from Java.Lang.Object (as all Parcelables must), and second it must have an empty constructor. This allows us to create an array of instances of the type, as required by IParcelableCreator.

Next in the constructor we require a delegate that can create and populate an instance of T. If you check back at our instantiation of the creator, we use a lambda expression that instantiates the instance using the private constructor we created that accepts a Parcel. Finally we implement the two methods required by IParcelableCreator, these simply create and populate the type, or create an array of the type.

Also remember that the creator must be thread-safe, if it isn’t bad things happen. To ensure thread safety we’ve made the state immutable, immutable types are by definition thread safe. If you need to create your own creator, be careful to follow thread safety guidelines. Microsoft have a good book on patterns and thread safety you can download for free.

Sample Code

You can download the sample project from GitHub here.

Select Item Item Selection Item Selected

Alternative to IParcelable

The problem with Parcelables is that you’re using up your very limited GREF resource. Additionally running two instances of an object across two garbage collectors isn’t the best use of memory or CPU resources. You’ll actually double up on instances as well, the instances that get packaged up in a parcel, and the instances that get extracted. The first set (senders) you can often clear from memory quickly, however the second set (received values) could be memory resident for quite some time as they’re used by the activity. The alternative is to either send just enough information for the activity to generate its own data, or you can send the data in an alternative format. You can send byte arrays, so you can use ISerializable and serialise your objects to binary. The other option is to use JSON (or other text-based format) and pass JSON strings between activities instead.

Unfortunately there is no ‘best’ solution, only the solution that meets your specific needs best.


Posted by Dan in C#, Mono for Android, Programming, Tutorials, 2 comments

Reachability in MonoTouch

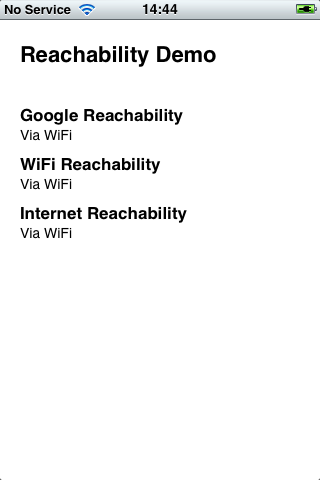
If you’re making an app that communicates with the network, at some point you’re going to need to check if the network is even there. This is where you need to use the NetworkReachability class, but it’s not particularly user-friendly. Tony Million produced a nice wrapper class, however it’s written in Obj-C not C#. Wouldn’t it be nice if there was a version in C# MonoTouch? Well now there is!

The Code & Usage

You can download the code at github here. Usage is really simple:

private Reachability _reachability;

public override void ViewDidLoad()
{
    base.ViewDidLoad();

    _reachability = new Reachability("www.google.co.uk");
    _reachability.ReachabilityUpdated += HandleReachabilityUpdated;
}

protected virtual void HandleReachabilityUpdated(object sender, ReachabilityEventArgs e)
{
    UpdateStatusLabel(e.Status, StatusLabel);
}

protected virtual void UpdateStatusLabel(ReachabilityStatus status, UILabel label)
{
    switch (status)
    {
        case ReachabilityStatus.NotReachable:
            label.Text = "Not Reachable";
            break;

        case ReachabilityStatus.ViaWiFi:
            label.Text = "Via WiFi";
            break;

        case ReachabilityStatus.ViaWWAN:
            label.Text = "Via WWAN";
            break;

        default:
            label.Text = "Unexpected status";
            break;
    }
}

Overview

To use, you create an instance of Reachability, specifying the remote host (or IP address) you need to connect to. Alternatively there are two static method that construct special versions of Reachability: ReachabilityForInternet, ReachabilityForLocalWiFi. These return an instance of Reachability that will be populated almost immediately, for this reason you need to use the CurrentStatus property of the instance, rather than relying on the update event. The update event will fire before you even have a chance to hook it up.

The ReachabilityUpdated event is fired whenever the connectivity changes. It’s highly recommended you use this event to track the connection, with mobile devices the connectivity can change at any time.

Caveats

There’s currently a bug in MonoTouch that causes the simulator to freeze when reachability is queried. The code will work fine on a device. Versions of MonoTouch designed for iOS 6 have fixed this bug, so if you’re using an iOS 6 capable version of MonoTouch you’ll be in the clear.

MonoMac

The code is designed to work with MonoMac too, however the SCNetworkReachability functions haven’t been bound yet. When they do I’ll update the code to work with MonoMac as well.

Posted by Dan in C#, Guides, MonoTouch, 1 comment

Using the Keychain in MonoMac

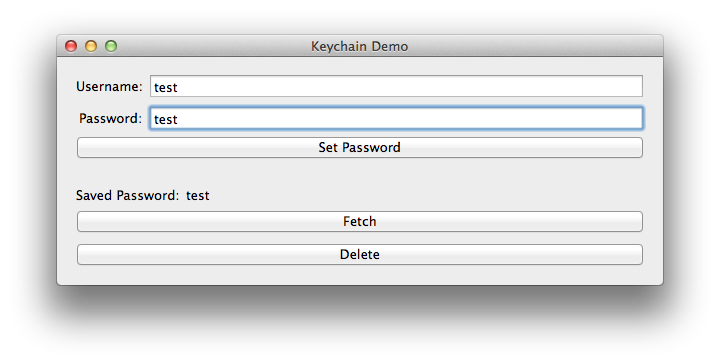
The keychain is a great feature in OS X, allowing you to store passwords securely. In this tutorial I’ll outline how to store passwords in the keychain so your apps don’t have to worry about securely storing the passwords themselves.

Before I start, you can skip straight to the code on github here.

A few pointers

The MonoMac binding of the OS X keychain is somewhat basic at this moment in time, however it should be enough for basic password storage. OS X supports multiple keychains, as well as multiple types of passwords. At the moment the MonoMac bindings limit you to the system (well, user’s login) keychain, and only the ‘Internet Password’ keychain type.

Additionally you’ll want to sign your app to ensure your passwords are uniquely identified, without signing I’ve noticed that other MonoMac apps authored by myself seem to conflict with each other.

Relevant Classes

We store keychain records in a class of SecRecord, while the SecKeyChain static class handles the interaction with the keychain itself. When searching for records, you’ll fill in a SecRecord with the fields you need to match, then get SecKeyChain to return a matching record. You need to be careful not to try and insert duplicate records, if you do it’ll be difficult to pull out the record you want – it’s undefined which one you’ll get. This can lead to odd bugs where one second you get the correct password, and the next you get the wrong one.

The password for Internet Passwords is stored in the ValueData property, this is of NSData type rather than the string you’re probably expecting.

Selecting

To fetch a record, you need to provide a record with the fields you want to filter by set. At a minimum you’ll want to specify the service and account (username):

var searchRecord = new SecRecord(SecKind.InternetPassword)
{
    Service = ServiceName,
    Account = username
};

SecStatusCode code;
var data = SecKeyChain.QueryAsRecord(searchRecord, out code);

if (code == SecStatusCode.Success)
    return data;
else
    return null;

This code will return a matching record, or NULL if none are found. If more than one record matches your search criteria, you’ll get a random record. For this reason make sure you never accidentally insert duplicate records, or you’ll get unpredictable behaviour in your app. Remember, the search record you specify will be used as the search criteria – the filled in fields will be used for the search.

To get the password from the record use the following code:

password = NSString.FromData(record.ValueData, NSStringEncoding.UTF8);

Remember, the ValueData property is NSData, not a string. If MonoMac allows you to use a record type of ‘Generic Password’, the password will be stored in the Generic property rather than ValueData. Generic is also an NSData type.

Inserting

Inserting a password involves filling out a SecRecord, and then calling Add() on SecKeyChain:

var record = new SecRecord(SecKind.InternetPassword)
{
    Service = ServiceName,
    Label = ServiceName,
    Account = username,
    ValueData = NSData.FromString(password)
};

SecKeyChain.Add(record);

However, if you remember from earlier – you never want to insert a record without checking for an existing one because you’ll risk adding a duplicate record. Once inserted, you’ll see your password in the keychain utlity:

For code on how to perform a check and then update / insert as necessary, check the sample code.

Updating

Updating involves sending in the existing record (or at least one that’ll uniquely identify the record you’re after), and a new record to replace it:

record.ValueData = NSData.FromString(password);
SecKeyChain.Update(searchRecord, record);

The first parameter is handled in exactly the same was as when querying for an existing record, the second parameter is your newly updated record.

Deleting

Deleting is remarkably similar to updating, except you only send in your search record:

var searchRecord = new SecRecord(SecKind.InternetPassword)
{
    Service = ServiceName,
    Account = username
};

SecKeyChain.Remove(searchRecord);

Finishing Up

This guide has demonstrated how to interact with the OS X keychain using MonoMac. Make sure to check out the sample project for a simple utility class that wraps up all of the necessary functionality with a friendly interface.

Posted by Dan in C#, Mac, Tutorials, 2 comments

wait_fences: failed to receive reply: 10004003

This error is cryptic and can have any number of causes, but the most common are:

  • Performing animations when the view isn’t on screen (use viewDidAppear, not viewWillAppear)
  • Failing to call super when overriding a method
  • Calling something in the UI from a thread other than the main UI one
  • Calling UI methods that dramatically change the view (such as presenting / hiding main views) too quickly
  • Calling UI methods before an alert has been dismissed

Basically the error is related to the UI. The message appearing in the output may not reflect the code that actually triggered it – so to debug you need to isolate the code that’s causing it. Your first port of call should be callbacks from alerts, or other popups. For me it was the UIImagePicker, I fixed it like so:

protected void FinishedPickingMedia(object sender, UIImagePickerMediaPickedEventArgs e)
{
    var picker = sender as UIImagePickerController;

    if (picker == null)
        return;

    picker.DismissModalViewControllerAnimated(true);
    if (picker == _picker)
	_picker = null;

    // Work with the image here

    // Bug fix for fences issue
    BeginInvokeOnMainThread(() =>
    {
        // CODE THAT INTERACTS WITH THE UI HERE
    });
}

The pertinent code is the BeginInvokeOnMainThread block, this is fixing the wait_fences issue. It looks like the callback method isn’t being executed on the UI thread. I’m not sure if this is an iOS SDK thing, or a quirk added by MonoTouch. It could also be that the picker is still animating away when I start tweaking the UI, causing the issue. For example messing about with the UI in the Clicked event of a UIAlertView can sometimes cause minor issues, moving the code to the Dismissed event fixes the issues completely.

Posted by Dan in C#, iOS, MonoTouch, 0 comments