visual studio

Including / Excluding files from build with VS2017 and .NET Core

I have a project where the wwwroot for an ASP.NET Core application is an SPA managed entirely by a node build chain. This means VS is completely hands-off with regards to the development of the UI, but it does have to somewhat be aware of it to debug and publish.

VS2015 / project.json Build

The project.json file looked as follows:

  "buildOptions": {
    "emitEntryPoint": true,
    "preserveCompilationContext": true,
    "compile": {
      "exclude": ["wwwroot"]
    }
  },

  "publishOptions": {
    "include": [
      "wwwroot/dist/prod",
      "appsettings.json",
      "web.config"
    ]
  }

This would result in the wwwroot not getting compiled whatsoever, but the files within ‘dist’ would get published along with the .NET code. The node_modules folder was hidden within the VS Solution Explorer.

VS2017 / CSProj build

The auto-migration with VS2017 will attempt to follow the changes in the project.json, but the end result won’t work. VS will be super slow due to the node_modules folder, while also trying to compile the Typescript. You can wholesale block the compilation of Typescript, but I prefer to be a bit more explicit about what I want VS to do. Edit the .csproj for your project, and use the following ItemGroup to do ensure it does the same as the project.json from earlier:

<ItemGroup>
  <Compile Remove="wwwroot\**" />
  <Content Remove="wwwroot\**" />
  <EmbeddedResource Remove="wwwroot\**" />
  <None Remove="wwwroot\**" />
  <Content Include="wwwroot\dist\prod\**\*" />
  <Content Update="wwwroot\dist\prod\**\*;appsettings.json;web.config">
    <CopyToPublishDirectory>PreserveNewest</CopyToPublishDirectory>
  </Content>
</ItemGroup>

This has the additional advantage in that the files we don’t care about in wwwroot are automatically hidden for all users of the solution – no manually hiding from Solution Explorer.
Posted by Dan in Programming, 2 comments

Customising Eclipse

Eclipse is a very good IDE, I hesitate to say ‘excellent’ because it does have its drawbacks. For example it constantly gets in a muddle with dependencies when you deal with plugins. It’s also developed in Java, so it’s not the fastest IDE in the world. Still, it does offer the most important functionality necessary for fast development of Android applications. Of course being a programmer means I’m notoriously fickle about my development environment – all IDEs should follow Visual Studio and that includes Eclipse. First on the agenda is code hinting, Visual Studio provides this instantly and so should Eclipse!

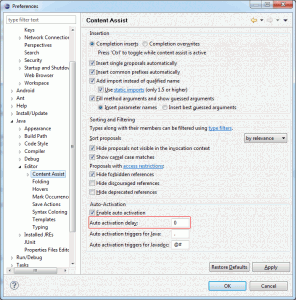
To bring up the handy dropdowns instantly, go to Window > Preferences. Then go to Java > Editor > Content Assist. Set the Auto activation delay to 0. Of course you’ll need a fast PC, but I’m sure you do.

Next up is the colour scheme, I have my own (which is the correct one) and many other programmers have their own (which are incorrect). Fortunately Eclipse Color Themes have your back. Install their plugin, then download the theme that most closely matches your ideal colour scheme. A minor tweak later and you should get a good match to what you’re used to:


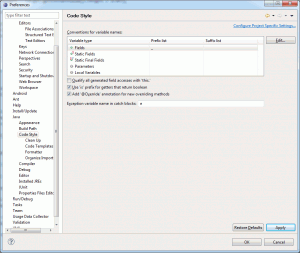
Lastly you’ll probably want to change the code formatting. What do you mean it’s fine as it is? OK OK, I was taught a specific code formatting style and to be frank while it’s not necessarily ‘standard’ in Java, it is very clear. I prefer code to be as clear as possible, giving bugs fewer places to hide. Fortunately Eclipse has the most advanced code formatting customisation I’ve ever seen. First up is the code style:


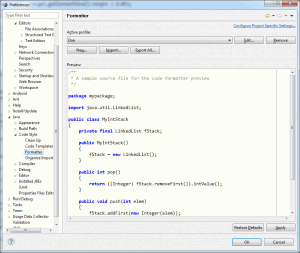
This lets you set up some basic prefixes / suffixes along with a few other style tweaks. The best part though, is the formatter:

This really lets you customise the code formatting, ensuring all code is formatted in the correct manner – my manner. The customisation is extremely extensive, and it’ll probably take you a while to make it format in exactly the manner you desire. Once you’re happy you can open up any source file and press CTRL + Shift + F to reformat the code, it’s extremely effective.

So that’s it for this little guide. There’s a lot to explore in the Eclipse preferences, and it’s well worth taking the time out to see just what’s available.

Posted by Dan in Guides, 1 comment