guide

CIFilters with MonoMac

In a recent project I found I needed to colourise (colorize to you Americans!) a greyscale image. Fortunately Apple have built-in support for various colour filters, including the multiply filter I needed. Unfortunately CoreImage only works on CoreImage images, not NSImages – and there’s no easy way to convert between the two.

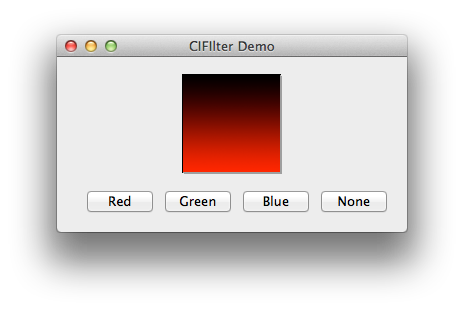
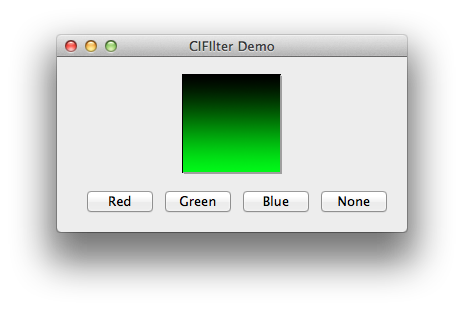
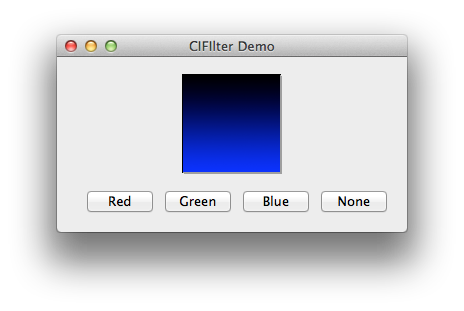
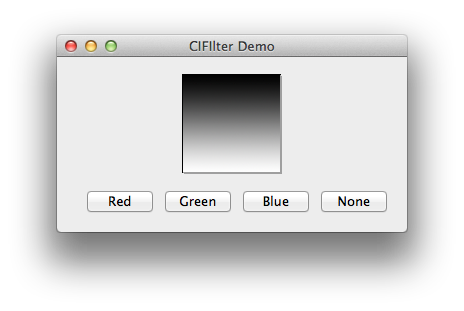
Original ImageRed TintGreen TintBlue Tint

Converting from CIImage to NSImage

Fortunately with Extension Methods, converting a CIImage to an NSImage isn’t too hard:

public static NSImage ToNSImage(this CIImage image)
{
	return ToNSImage(image, image.Extent.Size);
}

public static NSImage ToNSImage(this CIImage image, SizeF size)
{
	var imageRep = NSCIImageRep.FromCIImage(image);
	var nsImage = new NSImage(size);
	nsImage.AddRepresentation(imageRep);

	return nsImage;
}

First we get an NSCIImageRep instance from the CIImage – NSCIImageRep is a class that can render a CIImage. Next we create our new NSImage and use the AddRepresentation method to populate the NSImage with the CIImage. Internally the NSCIImageRep instance will render the CIImage to memory in a bitmap format, NSImage will then populate itself with this bitmap.

Tinting the Greyscale image with CoreImage

Now we don’t need to worry about using CIImages with abandon we can focus on the actual tinting. We need to load in our image, then we need to create a tint image, finally we need to multiply the two together just like in Photoshop. Let’s load in our graphics first:

var mainImage = CIImage.FromUrl(NSUrl.FromFilename(NSBundle.MainBundle.PathForResource(
	Path.GetFileNameWithoutExtension(ImagePath), Path.GetExtension(ImagePath))));
var tintImage = CIImage.ImageWithColor(CIColor.FromRgb(1f, 0f, 0f));

We load in the image using FromUrl here since it’s the most efficient manner. If we loaded in via an NSImage, we would be wasting memory in both the load and conversion process – better to load from the file system directly. If you need to use the same image repeatedly, load in the image as a byte array and create an instance of CIImage using the data.  Next we create our filter:

var filter = CIFilter.FromName("CIMultiplyCompositing");

Unfortunately MonoMac doesn’t contain strongly typed bindings for any CoreImage filters, so we need to populate the input parameters using Key-Value Coding:

filter.SetValueForKey(tintImage, (NSString)"inputImage");
filter.SetValueForKey(mainImage, (NSString)"inputBackgroundImage");

We need to cast here because Key-Value coding requires NSString instances. NSString has an implicit conversion operator for string, allowing us to cast string directly to NSString. Note the key names, these must match exactly, each filter has different parameters – a reference for all filter types and their parameters is available here. Now we can perform the tint and display the result:

var processedImage = (CIImage)filter.ValueForKey((NSString)"outputImage");
var outputImage = processedImage.ToNSImage();

ImageView.Image = outputImage;

And that’s it! If the filter fails for any reason ValueForKey will return NULL. The code above will apply a red tint and you should get something like:

Red Tint

Posted by Dan in C#, Guides, Mac, Mac, 0 comments

Implementing IParcelable in Mono for Android

If you want to pass values between activities in Android, you’ll probably want to implement Parcelable sooner or later. This isn’t particularly slick even when writing natively, but add Mono in and it becomes even murkier. Fortunately .NET’s Generics support helps us out a little. The reason for the rather heavy implementation is intents can cross process boundaries, meaning you can’t just provide a memory address. This gives you the ability to call apps / resources you haven’t programmed yourself, but unfortunately it means inter-activity communication is ‘heavy’ for want of a better term. If you’re thinking of using IParcelable in a brand new app that isn’t going to be receiving 3rd party parcels, consider the ‘alternatives’ at the end of this guide first. IParcelable is somewhat of a convenience API for serialising objects to binary and then de-serialising. You might be better off doing this yourself rather than using the ‘Android’ method.

Our Class

For this demo I want to pass an array of a really simple class:

public sealed class SelectListItem
{
	// Convenience constructors
	public SelectListItem() {}
	public SelectListItem(int id, string name)
	{
		Id = id;
		Name = name;
	}

	// The actual properties for this class
	public int Id { get; set; }
	public string Name { get; set; }
}

Reference ‘Mono.Android.Export’

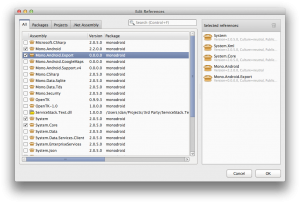
Before we start, make sure to reference the ‘Mono.Android.Export’ assembly:

Mono.Android.Export Assembly Reference

Implementing IParcelable

This class will be used to populate a ListActivity with a series of items that can be selected. First we need to inherit from Java.Lang.Object, and implement the IParcelable interface:

public sealed class SelectListItem : Java.Lang.Object, IParcelable

So why do we have to inherit from Java.Lang.Object? The Android runtime needs to be able to call the methods that we define as part of IParcelable, to do this our class must have a dual-personality. One half of the class is .NET, the other half is Java, it is this Java side that Android can see. When a method is called on the Java side, it will execute the .NET code. Clever huh? Unfortunately this means we now have two objects instead of one in memory, it also means that Mono must keep track of both objects. To do this it uses a global ID or reference, this reference links the two instances together. Unfortunately GREFs, are a very, very limited resource. The emulator only supports ~2,000 and devices usually only support ~50,000 GREFs. For more information on GREFs, check the Architecture and Garbage Collection documents over at Xamarin.

Before we implement the interface, we need to add an additional constructor that can accept a Parcel type. This constructor will populate the instance with the values from the parcel – the parcel being the ‘wrapped’ data of an instance of the same type:

// Create a new SelectListItem populated with the values in parcel
private SelectListItem(Parcel parcel)
{
	Id = parcel.ReadInt();
	Name = parcel.ReadString();
}

Note the order we read in the values, this is very important and must mirror the order in WriteToParcel below.

Next we need to implement the interface:

public int DescribeContents()
{
	return 0;
}

// Save this instance's values to the parcel
public void WriteToParcel(Parcel dest, ParcelableWriteFlags flags)
{
	dest.WriteInt(Id);
	dest.WriteString(Name);
}

DescribeContents is used for flagging ‘special objects’ within the parcel. I’ve never had cause to use this field, and 0 means ‘no special objects’.

WriteToParcel is where we write the instance data to the parcel, pay special attention to the order you write the values. This same order must be mirrored when reading in the parcel above. The flags attribute gives additional information on how the data should be written, it’s unlikely you’ll need to check these flags.

The CREATOR field

All Parcelable objects must have a public static field called CREATOR. The instance behind this field is responsible for creating instances of the object and populating them from the parcel. This can be done in two ways, an internal class that is implementation-specific, or a generic class that can be re-used repeatedly. The first method is the method commonly used in Java applications. However, with .NET we gain a much more robust Generics implementation so we’ll go down that route. However if you’re interested in the Java-favoured implementation it’s available in the sample project as a comment.

Without further ado, let’s look at how to declare our creator:

// The creator creates an instance of the specified object
private static readonly GenericParcelableCreator<SelectListItem> _creator
	= new GenericParcelableCreator<SelectListItem>((parcel) => new SelectListItem(parcel));

[ExportField("CREATOR")]
public static GenericParcelableCreator<SelectListItem> GetCreator()
{
	return _creator;
}

First we declare a private static instance, it’s required to be static by the Android API. Because this instance is static, it’s critical that your creator is thread safe otherwise bad things will happen. After the actual instance declaration we create a public static method, and decorate it with the ExportField attribute. Unfortunately this attribute can only be used on methods, so we can’t decorate our field directly. ExportField will ensure the Java version of our class gains a public static field named CREATOR.

A Generic ParcelableCreator Implementation

Earlier I mentioned that when developing with Java, each Parcelable requires a custom creator. Fortunately with .NET we gain a robust Generic implementation and we can use a generic creator that we can use again and again:

public sealed class GenericParcelableCreator<T> : Java.Lang.Object, IParcelableCreator
	where T : Java.Lang.Object, new()
{
	private readonly Func<Parcel, T> _createFunc;

	/// <summary>
	/// Initializes a new instance of the <see cref="ParcelableDemo.GenericParcelableCreator`1"/> class.
	/// </summary>
	/// <param name='createFromParcelFunc'>
	/// Func that creates an instance of T, populated with the values from the parcel parameter
	/// </param>
	public GenericParcelableCreator(Func<Parcel, T> createFromParcelFunc)
	{
		_createFunc = createFromParcelFunc;
	}

	#region IParcelableCreator Implementation

	public Java.Lang.Object CreateFromParcel(Parcel source)
	{
		return _createFunc(source);
	}

	public Java.Lang.Object[] NewArray(int size)
	{
		return new T[size];
	}

	#endregion
}

The creator must also be usable directly by Android, so again we have to inherit from Java.Lang.Object. We add two restrictions to the generic type parameter, first it must inherit from Java.Lang.Object (as all Parcelables must), and second it must have an empty constructor. This allows us to create an array of instances of the type, as required by IParcelableCreator.

Next in the constructor we require a delegate that can create and populate an instance of T. If you check back at our instantiation of the creator, we use a lambda expression that instantiates the instance using the private constructor we created that accepts a Parcel. Finally we implement the two methods required by IParcelableCreator, these simply create and populate the type, or create an array of the type.

Also remember that the creator must be thread-safe, if it isn’t bad things happen. To ensure thread safety we’ve made the state immutable, immutable types are by definition thread safe. If you need to create your own creator, be careful to follow thread safety guidelines. Microsoft have a good book on patterns and thread safety you can download for free.

Sample Code

You can download the sample project from GitHub here.

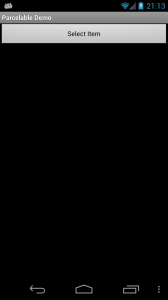
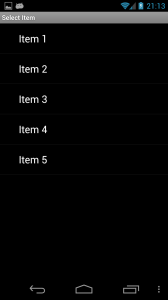
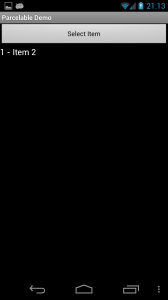
Select Item Item Selection Item Selected

Alternative to IParcelable

The problem with Parcelables is that you’re using up your very limited GREF resource. Additionally running two instances of an object across two garbage collectors isn’t the best use of memory or CPU resources. You’ll actually double up on instances as well, the instances that get packaged up in a parcel, and the instances that get extracted. The first set (senders) you can often clear from memory quickly, however the second set (received values) could be memory resident for quite some time as they’re used by the activity. The alternative is to either send just enough information for the activity to generate its own data, or you can send the data in an alternative format. You can send byte arrays, so you can use ISerializable and serialise your objects to binary. The other option is to use JSON (or other text-based format) and pass JSON strings between activities instead.

Unfortunately there is no ‘best’ solution, only the solution that meets your specific needs best.

Posted by Dan in C#, Mono for Android, Programming, Tutorials, 2 comments

Reachability in MonoTouch

If you’re making an app that communicates with the network, at some point you’re going to need to check if the network is even there. This is where you need to use the NetworkReachability class, but it’s not particularly user-friendly. Tony Million produced a nice wrapper class, however it’s written in Obj-C not C#. Wouldn’t it be nice if there was a version in C# MonoTouch? Well now there is!

The Code & Usage

You can download the code at github here. Usage is really simple:

private Reachability _reachability;

public override void ViewDidLoad()
{
    base.ViewDidLoad();

    _reachability = new Reachability("www.google.co.uk");
    _reachability.ReachabilityUpdated += HandleReachabilityUpdated;
}

protected virtual void HandleReachabilityUpdated(object sender, ReachabilityEventArgs e)
{
    UpdateStatusLabel(e.Status, StatusLabel);
}

protected virtual void UpdateStatusLabel(ReachabilityStatus status, UILabel label)
{
    switch (status)
    {
        case ReachabilityStatus.NotReachable:
            label.Text = "Not Reachable";
            break;

        case ReachabilityStatus.ViaWiFi:
            label.Text = "Via WiFi";
            break;

        case ReachabilityStatus.ViaWWAN:
            label.Text = "Via WWAN";
            break;

        default:
            label.Text = "Unexpected status";
            break;
    }
}

Overview

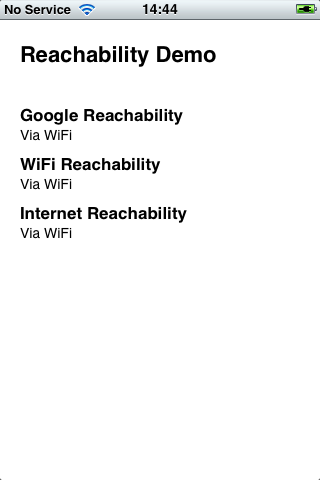
To use, you create an instance of Reachability, specifying the remote host (or IP address) you need to connect to. Alternatively there are two static method that construct special versions of Reachability: ReachabilityForInternet, ReachabilityForLocalWiFi. These return an instance of Reachability that will be populated almost immediately, for this reason you need to use the CurrentStatus property of the instance, rather than relying on the update event. The update event will fire before you even have a chance to hook it up.

The ReachabilityUpdated event is fired whenever the connectivity changes. It’s highly recommended you use this event to track the connection, with mobile devices the connectivity can change at any time.

Caveats

There’s currently a bug in MonoTouch that causes the simulator to freeze when reachability is queried. The code will work fine on a device. Versions of MonoTouch designed for iOS 6 have fixed this bug, so if you’re using an iOS 6 capable version of MonoTouch you’ll be in the clear.

MonoMac

The code is designed to work with MonoMac too, however the SCNetworkReachability functions haven’t been bound yet. When they do I’ll update the code to work with MonoMac as well.

Posted by Dan in C#, Guides, MonoTouch, 1 comment

iPhone Glyphs from ‘Apple Symbols’ in Lion / Mountain Lion

The Apple Symbols font provides a lot of the symbols used in iOS, however since Lion it’s been harder to get at them. Here is how to use them if you’re on Lion or above:

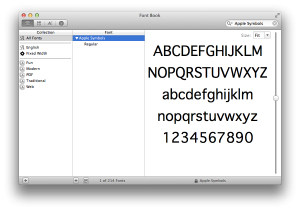
First open Font Book and open up the Apple Symbols font.

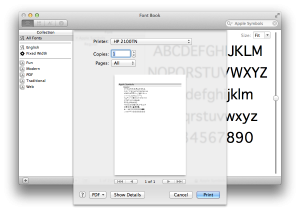
Next, bring up the print dialog (CMD + P).

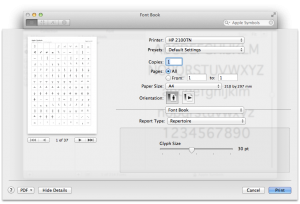
Now click on ‘Show Details’

Change the Report Type to ‘Repetoire’. Next change the glyph size to something larger, I find 30pt about right most of the time.

Now click on the PDF button in the bottom left, and save the PDF somewhere.

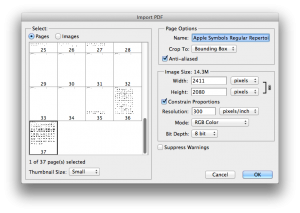
Next, start up Photoshop and drag the PDF into the stage.

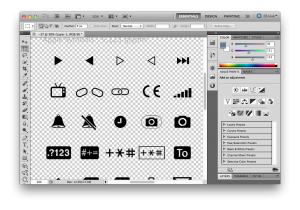
You want the last couple of pages for the iOS glyphs. Make sure the resolution is high enough, I like to go for a dpi of 300. Click on OK and you should be presented with the glyphs nicely anti-aliased with a transparent background:

Glyps are ready to go!

Posted by Dan in Guides, iOS, Programming, Tutorials, 0 comments

Running multiple instances of MonoDevelop on Mac

By default OS X will only let you run a single instance of any app, which is OK if the app is designed with multiple windows & a single instance in mind. MonoDevelop is a different beast, and sooner or later you’re going to want to run at least 2 instances of it, here’s how:

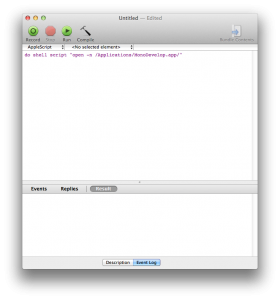
First run the AppleScript editor, and enter the following code:

do shell script "open -n /Applications/MonoDevelop.app/"

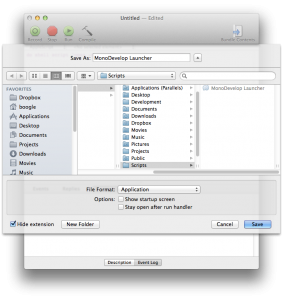
Now save the script somewhere easily accessible, make sure to set the ‘File Format’ to ‘Application’. I chose the name ‘MonoDevelop Launcher’:

Now the only problem left is the icon, it’s most likely the AppleScript icon, rather than the MonoDevelop one:

Use ‘Get Info’ to get the info for both your new launcher, and MonoDevelop. Click on the icon for MonoDevelop and press CMD+C. Now click on the icon for your script, and press CMD+V. The icon should now be correct:

References: Based on answer by ‘Subfuzion’ as StackOverflow

Posted by Dan in Guides, Mac, Programming, 0 comments

Using UIGestureRecognizer in MonoTouch

Gesture Recognisers are a great feature added in iOS 3.2 (ages ago!), and using them in MonoTouch couldn’t be simpler. I’ll skip over a discussion on how they work, if you want more info on the recognisers themselves, be sure to check out the Apple documentation.

Selectors

UIGestureRecognizer instances use selectors to call back methods in your class. Selectors are supported in MonoTouch, you just need to do a little more work:

[Export("ViewTapSelector")]
protected void OnViewTapped(UIGestureRecognizer sender)
{
    MessageLabel.Text = "View Tapped";
}

Essentially you need to create a method, then mark it for export. This tells the MonoTouch compiler to make the method callable by ObjC code. Make sure the containing class is decorated with the Register attribute (ViewControllers are automatically registered).

First Recogniser

Setting up a UIGestureRecognizer is very easy:

var tapRecogniser = new UITapGestureRecognizer(this, new MonoTouch.ObjCRuntime.Selector("ViewTapSelector"));
View.AddGestureRecognizer(tapRecogniser);

This creates a new recogniser, with a callback and assigns it to the root view for the controller. You don’t need to worry about garbage collection since the view will retain the recogniser. You can access all of the recognisers for a view by using the GestureRecognizers property.

That’s it!

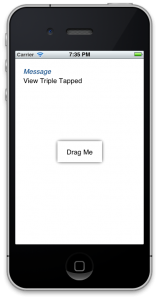
Surprisingly that’s all there is to it! You can download an example project here, or just view the code snippet below to flesh out the principles:

Sample Code

private void SetupGestureRecognisers()
{
    var tapRecogniser = new UITapGestureRecognizer(this, new MonoTouch.ObjCRuntime.Selector("ViewTapSelector"));
    View.AddGestureRecognizer(tapRecogniser);

    var doubleTapRecogniser = new UITapGestureRecognizer(this, new MonoTouch.ObjCRuntime.Selector("ViewDoubleTapSelector"));
    doubleTapRecogniser.NumberOfTapsRequired = 3;
    View.AddGestureRecognizer(doubleTapRecogniser);

    var longPressRecogniser = new UILongPressGestureRecognizer(this, new MonoTouch.ObjCRuntime.Selector("LongPressSelector"));
    View.AddGestureRecognizer(longPressRecogniser);

    var panRecogniser = new UIPanGestureRecognizer(this, new MonoTouch.ObjCRuntime.Selector("LabelPanSelector"));
    DragLabel.AddGestureRecognizer(panRecogniser);
}

[Export("ViewTapSelector")]
protected void OnViewTapped(UIGestureRecognizer sender)
{
    MessageLabel.Text = "View Tapped";
}

[Export("ViewDoubleTapSelector")]
protected void OnViewDoubleTapped(UIGestureRecognizer sender)
{
    MessageLabel.Text = "View Triple Tapped";
}

[Export("LongPressSelector")]
protected void OnLongPress(UIGestureRecognizer sender)
{
    MessageLabel.Text = "View Long Pressed";
}

[Export("LabelPanSelector")]
protected void OnLabelPan(UIGestureRecognizer sender)
{
    var panRecogniser = sender as UIPanGestureRecognizer;

    if (panRecogniser == null)
        return;

    switch (panRecogniser.State)
    {
        case UIGestureRecognizerState.Began:
            _originalPosition = DragLabel.Frame.Location;
            break;

        case UIGestureRecognizerState.Cancelled:
        case UIGestureRecognizerState.Failed:
            DragLabel.Frame = new RectangleF(_originalPosition, DragLabel.Frame.Size);
            break;

        case UIGestureRecognizerState.Changed:
            var movement = panRecogniser.TranslationInView(View);
            var newPosition = new PointF(movement.X + _originalPosition.X, movement.Y + _originalPosition.Y);
            DragLabel.Frame = new RectangleF(newPosition, DragLabel.Frame.Size);
            break;
    }
}
Posted by Dan in C#, iOS, MonoTouch, Tutorials, 4 comments

Getting Back / Forward mouse buttons working in Mac OS X

If you want to use mouse buttons #4 and #5 to go forward / backward in Mac OS X out of the box you’re going to be disappointed, and end up with just a scroll icon appearing.

There’s a few utilities you can use to fix this:

  • Microsoft IntelliPoint – Only works with MS mice, doesn’t seem to work in Mountain Lion
  • Logitech Control Centre – Only works with Logitech mice, apparently quite buggy now
  • Razer software – not tested, will only work with Razer mice anyway
  • Steermouse – Getting increasingly flakey with new OS X versions
  • USB Overdrive – Not been in development since Snow Leopard, doesn’t seem to work 100% of the time anymore
  • ControllerMate – Works!

ControllerMate to the rescue!

ControllerMate is actively developed & maintained, and offers an incredible amount of customisation for all HID peripherals. So not only will it sort out your back / forward issue, it’ll also solve the mouse acceleration issue – if that’s a problem for you. This guide will cover back / forward only, though.

1. First download and install ControllerMate.

2. Reboot and launch ControllerMate.

You’ll now be presented with a scary as hell screen that looks like you’re laying out circuit boards, rather than fixing a major limitation in OS X.

The diagrams in place on first launch are a kind of mini tutorial, telling you how you can do a few things. You can either leave them in place for future reference, or delete them to clean up the view.

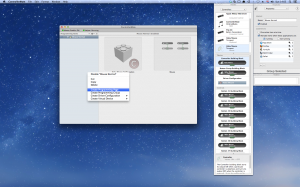
The first step is to create a new Programming Group:

3. To do this, right-click in the sidebar and select ‘Create Programming Group”.

4. Afterwards, right-click on the new group, and select ‘Create Programming Page’.

5. Now right-click on the new group again, point to ‘Create Driver Configuration’, then select your mouse.

You can name your new items in the ‘Inspector’ window to the right.

6. Click on your programming page to display an empty grid.

7. In the ‘Palette’ to the right, select ‘Controllers’ from the drop down list. Find your mouse, then drag button #4, and button #5 to the grid.

8. Now select ‘Output’ from the drop down list in the Palette. Drag an instance of ‘Keystrokes Building Block’ underneath each of your mouse button instances.

You should now have something like this (without the green lines):

9. Link the blocks, by dragging from the button’s green hotspot, to the action’s green hotspot. Just as in the screenshot above.

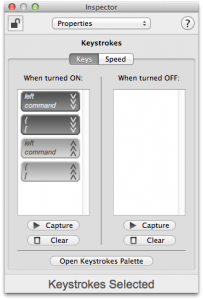
10. Click on the keystroke block for button #4. In the Inspector window, click on the ‘Keys’ tab, then click on ‘Capture’. Enter they key combination for ‘Back’ (Command + [), then press stop.

If the command doesn’t appear correctly, click on ‘Open Keystrokes Palette’, and drag the buttons from the virtual keyboard to the window, as seen above.

11. Do the same for button #5’s keystroke block, but this time use the command for forward (Command + ]).

12. Click on the driver configuration item in the sidebar, and set buttons #4 and #5 to ‘None’.

You’re now done! Backward / Forward should work immediately in all apps.

But now my VM / Other App doesn’t respond to buttons #4 and #5!

This is a problem as a result of disabling the buttons and remapping them to forward / back. Fortunately there is a solution!

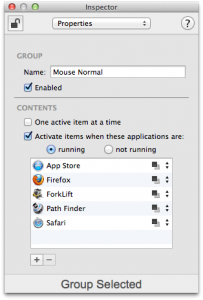
  1. Click on the group in the sidebar
  2. In the ‘Inspector’ window, check ‘Activate items when these applications are:’, select ‘running’
  3. Add all of the apps that you want to add back / forward support to the list.

Now the mouse will work in all applications. If an app supports backward / forward, remember to add it to the list above.

More VM

Not all VMs support the extra mouse buttons, even if they’re receiving them. If you’re having trouble, try following my follow-up guide for Parallels.

Posted by Dan in Guides, Mac, 22 comments

Enum in Java with int conversion

If you’ve found this post, chances are you want to convert from an enum to an int, or alternatively from an int to an enum in Java. Well… you can’t. Java has the most robust implementation of the ‘enum pattern’ of any language, in essence enums are a class that can only be instantiated once. This makes them ideal as singletons by the way…

Anyway, since enums are a class, you need to provide the int functionality yourself. For my example, I’m going to be making a ‘difficulty’ enum which should be very familiar with anyone making games for Android. First declare your enum:

public enum Difficulty
{
    EASY(0),
    MEDIUM(1),
    HARD(2);

    /**
     * Value for this difficulty
     */
    public final int Value;

    private Difficulty(int value)
    {
        Value = value;
    }
}

This should be fairly familiar to you if you’ve worked with Java enums for any length of time. Each enum is effectively an instance of itself, so we can pass values to the constructor. We store the value in a final field (enums are by definition immutable – don’t go breaking this without good reason!) for future retrieval. Ideally the value should be accessed by a getter rather than directly, but I think in this case it makes more sense to making it a public field. The user can’t change it, and we don’t need any code to run on access; so I think a getter would just reduce performance and make consumption that little bit more tedious.

Now we need to add the important part, the conversion from int to the enum itself:

// Mapping difficulty to difficulty id
private static final Map<Integer, Difficulty> _map = new HashMap<Integer, Difficulty>();
static
{
    for (Difficulty difficulty : Difficulty.values())
        _map.put(difficulty.Value, difficulty);
}

/**
 * Get difficulty from value
 * @param value Value
 * @return Difficulty
 */
public static Difficulty from(int value)
{
    return _map.get(value);
}

So what are we doing here, exactly? Well we create a map that will be our lookup table, we do this rather than a switch statement to minimise long-term maintenance. If someone added an extra enumeration in the future, they may forget to update the switch statement – and this error won’t be picked up until runtime, and even then it may appear as incorrect behaviour rather than throwing an exception. After we’ve created the map, we populate it automatically by looping through all of the enums and adding them and their value to the map.

So there you have it, the proper pattern for adding int values to an enumeration. The code in full is below:

public enum Difficulty
{
    EASY(0),
    MEDIUM(1),
    HARD(2);

    /**
     * Value for this difficulty
     */
    public final int Value;

    private Difficulty(int value)
    {
        Value = value;
    }

    // Mapping difficulty to difficulty id
    private static final Map<Integer, Difficulty> _map = new HashMap<Integer, Difficulty>();
    static
    {
        for (Difficulty difficulty : Difficulty.values())
            _map.put(difficulty.Value, difficulty);
    }

    /**
     * Get difficulty from value
     * @param value Value
     * @return Difficulty
     */
    public static Difficulty from(int value)
    {
        return _map.get(value);
    }
}

Bonus

OK I can’t leave you with just this without providing a little ‘from here’ info. Switching on an enum in Java isn’t ideal since you can add all sorts of information to the enum to minimise the necessity for a glorified if..elseif statement. For this difficulty example, we could add a ‘multiplier’ field that allows code to automatically modify state values based on the selected difficulty. See below:

public enum Difficulty
{
    EASY(0, 0.5f),
    MEDIUM(1, 1.0f),
    HARD(2, 2.0f);

    /**
     * Value for this difficulty
     */
    public final int Value;

    /**
     * Multiplier for difficulty
     */
    public final float DifficultyMultiplier;

    private Difficulty(int value, float multiplier)
    {
        Value = value;
        DifficultyMultiplier = multiplier;
    }
}

So now we’ve added the multiplier to the difficulty, we could use it like so:

enemy.speed = baseSpeed * difficulty.DifficultyMultiplier;
player.speed = baseSpeed / difficulty.DifficultyMultiplier;

This has the added advantage that you can manipulate the global difficulty in a single central place.

Posted by Dan in Guides, Java, 7 comments

Network Game Synchronisation

This is going to be a slightly more ‘abstract’ post compared to what I normally do, but I think it’ll be useful for anyone making multi-player games. The biggest problem with multi-player games is network latency & bandwidth. This is something you just have to design for with your game mechanics, for example many MMOs have ‘cast times’ for most actions to cover the latency between the various clients and the server.

In this post I’m going to show clock synchronisation, a kind of synchronisation where you can ensure your various clients are all sharing the same timestamp as the host, give or take a few ms. For my game, having the same clock on all clients means I can time actions to occur simultaneously across all users. The code below is Java for Android, but it can be ported across to other platforms easily enough.

First you need to request the host’s current timestamp:

_timeRequest = System.currentTimeMillis();
_networkDroid.sendMessage(address, GameMessage.REQUEST_TIME);

_timeRequest in this case is a long field, while _networkDroid is my networking layer. Next when you get a response, you need to get the offset between the host’s timestamp and the client’s:

long currentTime = System.currentTimeMillis();
long travelTime = (currentTime - _timeRequest) / 2;

_timeDifference = (int)(currentTime - (remoteTimestamp + travelTime));
_timeRequest = 0;

In this code we first get the client’s current time, we get this as early as possible to minimise the error margin. Next we work out how long it took the packet to arrive from the host – we do this by dividing the total transit time by 2 (the first half was sending the request). Next we work out the difference between the hosts timestamp (with transit time taken into account) and the client’s timestamp.

Finally to get the synchronised timestamp is simple:

return System.currentTimeMillis() - _timeDifference;

And there you have it, synchronised clocks!

Posted by Dan in Game, Guides, Programming, 0 comments

WP7Contrib Transitions Part 3 – LongListSelector

Make sure to read parts 1 and 2 first!

By now you’re probably loving the transitions on offer from WP7Contrib, but have found a slight problem in that the Turnstile Feather animation doesn’t work with the LongListSelector as provided by the WP7 Silverlight Toolkit. Fear not! For the opensource nature of WP7Contrib means we can extend the transitions functionality to support the LongListSelector as well as the standard ListBox. It should be noted that these changes aren’t perfect, and are largely a hack to add the functionality in as short a timespan as possible. You can download the demo app here to see the changes in action.

Let’s Have At It

First you need to download the WP7Contrib sourcecode, the code in this example is associated with revision 66430. You can try applying the changes to the latest revision, however note that things have most definitely moved on since 66430.

Open up the solution you’ve downloaded, then expand the ‘WP7Contrib.View.Transitions’ project. Expand ‘Animation’ and open up ‘TurnstileFeatherAnimator.cs’ and add the following properties to the class:

/// <summary>
/// Is BackwardIn or BackwardOut
/// </summary>
protected bool IsBackward { get; set; }

/// <summary>
/// Run the completion action first rather than on completion
/// </summary>
protected bool RunCompletionAnimationFirst { get; set; }

private Action _completionAnimationAction;
private Action _actualBeginAction;
private Action _completionAction;

Change the datatype of the ‘ListBox’ property to ‘Control’, this is so we can use either a ListBox or a LongListSelector without modifying client code.

The IsBackward property tells us if this is a Backward animation, this is required to fix some bugs in the way the LongListSelector handles itself when the page is restored when the user navigates backward.

The RunCompletionAnimationFirst property tells the animator to run the completion animation first or not. This is necessary because I perform a Turnstile animation on the RootElement to complete the feather effect. This turnstile animation needs to run first if the elements are animating in, and last if the elements are animating out.

The three Action properties are necessary to order animations in the correct order, and then perform the actual completion action. These properties will make more sense when you see the implementation details.

Now replace all of the methods in the ‘Public Methods’ region with the following:

/// <summary>
/// The begin.
/// </summary>
/// <param name="completionAction">
/// The completion action.
/// </param>
public override void Begin(Action completionAction)
{
    _completionAction = completionAction;
    completionAction = new Action(AnimationsCompleted);

    if (RunCompletionAnimationFirst)
    {
        _completionAnimationAction = ActualBegin;
        _actualBeginAction = completionAction;

        HideListItems();
        BeginCompletionAnimation();
    }
    else
    {
        _completionAnimationAction = completionAction;
        _actualBeginAction = BeginCompletionAnimation;

        ActualBegin();
    }
}

private void BeginCompletionAnimation()
{
    CompletionAnimation.RootElement = this.RootElement;
    CompletionAnimation.Begin(_completionAnimationAction);
}

private void HideListItems()
{
    if (ListBox is LongListSelector)
    {
        foreach (ContentPresenter li in ((LongListSelector)ListBox).GetItemsWithContainers(false, true).OfType<ContentPresenter>())
            li.Opacity = 0;
    }
    else if (ListBox is ListBox)
    {
        foreach (ContentControl li in ((ListBox)ListBox).GetVisualDescendants().OfType<ListBoxItem>().Where(lbi => IsOnCurrentPage(lbi) && lbi.IsEnabled))
            li.Opacity = 0;
    }
}

private void AnimationsCompleted()
{
    if (!this.IsBackward && ListBox is LongListSelector)
    {
        LongListSelector listBox = (LongListSelector)ListBox;

        listBox.UpdateLayout();
        listBox.SelectedItem = null;
    }

    _completionAction();

    _completionAnimationAction = null;
    _actualBeginAction = null;
    _completionAction = null;
}

private void ActualBegin()
{
    if (ListBox is ListBox)
        ActualBeginListBox();
    else if (ListBox is LongListSelector)
        ActualBeginLongListSelector();
    else
        throw new InvalidOperationException("ListBox must be of type System.Windows.Controls.ListBox or Microsoft.Phone.Controls.LongListSelector");

    base.Begin(_actualBeginAction);
}

private void ActualBeginListBox()
{
    Storyboard = new Storyboard();
    ListBox listBox = (ListBox)ListBox;

    double liCounter = 0;
    var listBoxItems = listBox.GetVisualDescendants().OfType<ListBoxItem>().Where(lbi => IsOnCurrentPage(lbi) && lbi.IsEnabled).ToList();

    if (HoldSelectedItem && Direction == Directions.Out && listBox.SelectedItem != null)
    {
        //move selected container to end
        var selectedContainer = listBox.ItemContainerGenerator.ContainerFromItem(listBox.SelectedItem);
        listBoxItems.Remove(selectedContainer as ListBoxItem);
        listBoxItems.Add(selectedContainer as ListBoxItem);
    }

    foreach (ContentControl li in listBoxItems)
    {
        GeneralTransform gt = li.TransformToVisual(RootElement);
        Point globalCoords = gt.Transform(new Point(0, 0));
        double heightAdjustment = li.Content is FrameworkElement ? ((li.Content as FrameworkElement).ActualHeight / 2) : (li.ActualHeight / 2);
        //double yCoord = globalCoords.Y + ((((System.Windows.FrameworkElement)(((System.Windows.Controls.ContentControl)(li)).Content)).ActualHeight) / 2);
        double yCoord = globalCoords.Y + heightAdjustment;

        double offsetAmount = (RootElement.ActualHeight / 2) - yCoord;

        PlaneProjection pp = new PlaneProjection();
        pp.GlobalOffsetY = offsetAmount * -1;
        pp.CenterOfRotationX = 0;
        li.Projection = pp;

        CompositeTransform ct = new CompositeTransform();
        ct.TranslateY = offsetAmount;
        li.RenderTransform = ct;

        var beginTime = TimeSpan.FromMilliseconds((FeatherDelay * liCounter) + InitialDelay);

        if (Direction == Directions.In)
        {
            li.Opacity = 0;

            DoubleAnimationUsingKeyFrames daukf = new DoubleAnimationUsingKeyFrames();

            EasingDoubleKeyFrame edkf1 = new EasingDoubleKeyFrame();
            edkf1.KeyTime = beginTime;
            edkf1.Value = Angle;
            daukf.KeyFrames.Add(edkf1);

            EasingDoubleKeyFrame edkf2 = new EasingDoubleKeyFrame();
            edkf2.KeyTime = TimeSpan.FromMilliseconds(Duration).Add(beginTime);
            edkf2.Value = 0;

            ExponentialEase ee = new ExponentialEase();
            ee.EasingMode = EasingMode.EaseOut;
            ee.Exponent = 6;

            edkf2.EasingFunction = ee;
            daukf.KeyFrames.Add(edkf2);

            Storyboard.SetTarget(daukf, li);
            Storyboard.SetTargetProperty(daukf, new PropertyPath("(UIElement.Projection).(PlaneProjection.RotationY)"));
            Storyboard.Children.Add(daukf);

            DoubleAnimation da = new DoubleAnimation();
            da.Duration = TimeSpan.FromMilliseconds(0);
            da.BeginTime = beginTime;
            da.To = 1;

            Storyboard.SetTarget(da, li);
            Storyboard.SetTargetProperty(da, new PropertyPath("(UIElement.Opacity)"));
            Storyboard.Children.Add(da);
        }
        else
        {
            li.Opacity = 1;

            DoubleAnimation da = new DoubleAnimation();
            da.BeginTime = beginTime;
            da.Duration = TimeSpan.FromMilliseconds(Duration);
            da.To = Angle;

            ExponentialEase ee = new ExponentialEase();
            ee.EasingMode = EasingMode.EaseIn;
            ee.Exponent = 6;

            da.EasingFunction = ee;

            Storyboard.SetTarget(da, li);
            Storyboard.SetTargetProperty(da, new PropertyPath("(UIElement.Projection).(PlaneProjection.RotationY)"));
            Storyboard.Children.Add(da);

            da = new DoubleAnimation();
            da.Duration = TimeSpan.FromMilliseconds(10);
            da.To = 0;
            da.BeginTime = TimeSpan.FromMilliseconds(Duration).Add(beginTime);

            Storyboard.SetTarget(da, li);
            Storyboard.SetTargetProperty(da, new PropertyPath("(UIElement.Opacity)"));
            Storyboard.Children.Add(da);
        }

        liCounter++;
    }
}

private void ActualBeginLongListSelector()
{
    Storyboard = new Storyboard();
    LongListSelector listBox = (LongListSelector)ListBox;

    double liCounter = 0;
    var listBoxItems = listBox.GetItemsWithContainers(false, true).OfType<ContentPresenter>().ToList();

    if (HoldSelectedItem && Direction == Directions.Out && listBox.SelectedItem != null)
    {
        //move selected container to end
        var listBoxItemsInView = listBox.GetItemsWithContainers(true, true).OfType<ContentPresenter>();
        var selectedContainer = listBoxItemsInView.Where(i => i.Content == listBox.SelectedItem).FirstOrDefault();

        if (selectedContainer != null)
        {
            listBoxItems.Remove(selectedContainer);
            listBoxItems.Add(selectedContainer);
        }
    }

    foreach (ContentPresenter li in listBoxItems)
    {
        GeneralTransform gt = li.TransformToVisual(RootElement);
        Point globalCoords = gt.Transform(new Point(0, 0));
        //double heightAdjustment = li.Content is FrameworkElement ? ((li.Content as FrameworkElement).ActualHeight / 2) : (li.ActualHeight / 2);
        double heightAdjustment = li.ActualHeight / 2;
        //double yCoord = globalCoords.Y + ((((System.Windows.FrameworkElement)(((System.Windows.Controls.ContentControl)(li)).Content)).ActualHeight) / 2);
        double yCoord = globalCoords.Y + heightAdjustment;

        double offsetAmount = (RootElement.ActualHeight / 2) - yCoord;

        PlaneProjection pp = new PlaneProjection();
        pp.GlobalOffsetY = offsetAmount * -1;
        pp.CenterOfRotationX = 0;
        li.Projection = pp;

        CompositeTransform ct = new CompositeTransform();
        ct.TranslateY = offsetAmount;
        li.RenderTransform = ct;

        var beginTime = TimeSpan.FromMilliseconds((FeatherDelay * liCounter) + InitialDelay);

        if (Direction == Directions.In)
        {
            li.Opacity = 0;

            DoubleAnimationUsingKeyFrames daukf = new DoubleAnimationUsingKeyFrames();

            EasingDoubleKeyFrame edkf1 = new EasingDoubleKeyFrame();
            edkf1.KeyTime = beginTime;
            edkf1.Value = Angle;
            daukf.KeyFrames.Add(edkf1);

            EasingDoubleKeyFrame edkf2 = new EasingDoubleKeyFrame();
            edkf2.KeyTime = TimeSpan.FromMilliseconds(Duration).Add(beginTime);
            edkf2.Value = 0;

            ExponentialEase ee = new ExponentialEase();
            ee.EasingMode = EasingMode.EaseOut;
            ee.Exponent = 6;

            edkf2.EasingFunction = ee;
            daukf.KeyFrames.Add(edkf2);

            Storyboard.SetTarget(daukf, li);
            Storyboard.SetTargetProperty(daukf, new PropertyPath("(UIElement.Projection).(PlaneProjection.RotationY)"));
            Storyboard.Children.Add(daukf);

            DoubleAnimation da = new DoubleAnimation();
            da.Duration = TimeSpan.FromMilliseconds(0);
            da.BeginTime = beginTime;
            da.To = 1;

            Storyboard.SetTarget(da, li);
            Storyboard.SetTargetProperty(da, new PropertyPath("(UIElement.Opacity)"));
            Storyboard.Children.Add(da);
        }
        else
        {
            li.Opacity = 1;

            DoubleAnimation da = new DoubleAnimation();
            da.BeginTime = beginTime;
            da.Duration = TimeSpan.FromMilliseconds(Duration);
            da.To = Angle;

            ExponentialEase ee = new ExponentialEase();
            ee.EasingMode = EasingMode.EaseIn;
            ee.Exponent = 6;

            da.EasingFunction = ee;

            Storyboard.SetTarget(da, li);
            Storyboard.SetTargetProperty(da, new PropertyPath("(UIElement.Projection).(PlaneProjection.RotationY)"));
            Storyboard.Children.Add(da);

            da = new DoubleAnimation();
            da.Duration = TimeSpan.FromMilliseconds(10);
            da.To = 0;
            da.BeginTime = TimeSpan.FromMilliseconds(Duration).Add(beginTime);

            Storyboard.SetTarget(da, li);
            Storyboard.SetTargetProperty(da, new PropertyPath("(UIElement.Opacity)"));
            Storyboard.Children.Add(da);
        }

        liCounter++;
    }
}

This is a lot of code! Fortunately this is the only major change to add the functionality we need. In the Begin method we set up our actions mentioned in the properties earlier. The completionAction is the action performed when all animations are completed, just like the original implementation. _actualBeginAction is the action the ActualBegin() method will execute upon completion. This will either be the completionAction, or an action to trigger the completion animation.

The completion animation is badly named, since it can run either at the start or the end of the feather animation.

After the actions are set up, we call the first animation. The first animation will then call the second animation, which will call the completionAction. So as an overview the method calls will be:

Completion animation first: Begin() > BeginCompletionAnimation() > HideListItems() > ActualBegin() > AnimationsCompleted() > CompletionAction()
Completion animation last: Begin() > ActualBegin() > BeginCompletionAnimation() > AnimationsCompleted() > CompletionAction()

We have an additional call to HideListItems() if the completion animation is run first. This is because the screen pivots in and then animates the list. The problem is if the list is visible from the outset you would see the list turnstile-in, then suddenly disappear and animate.

ActualBegin() is where we perform the actual Feather animation. We check the type of control passed in, and trigger the correct animation code. The code is largely the same between the two except for a little setup where we use the methods provided by the LongListSelector to get the containers for the visible elements. This means implementation on the surface is actually easier than with the ListBox where we have to work out which elements are visible.

AnimationsCompleted()

So why do we have an additional method that we run at the end of the animation? This is neccesary to fix a bug in the LongListSelector where the control won’t respond to input from the user after the animation is completed. We call UpdateLayout() to trigger the LongListSelector to sort itself out. Finally we set the SelectedItem to null. This is an implementation detail I’ve found useful for myself – however, you may well want to remove this line. In essence by leaving the item selected, it is the last item to animate off of the list. However, I never want the item to remain selected, so I clear the selection automatically. This isn’t ideal behaviour for a professional control, so don’t go duplicating this kind of hideous hack in your own controls!

Finishing Up

Now we need to tweak the animators themselves to support the new functionality. Update the animators as follows:

public TurnstileFeatherBackwardInAnimator()
{
    this.IsBackward = true;
    this.Duration = 350;
    this.Angle = 50;
    this.FeatherDelay = 50;
    this.Direction = Directions.In;
    this.CompletionAnimation = new TurnstileBackwardInAnimator();
    this.RunCompletionAnimationFirst = true;
}
public TurnstileFeatherBackwardOutAnimator()
{
    this.IsBackward = true;
    this.Duration = 250;
    this.Angle = -80;
    this.FeatherDelay = 50;
    this.Direction = Directions.Out;
    this.CompletionAnimation = new TurnstileBackwardOutAnimator();
}
public TurnstileFeatherForwardInAnimator()
{
    this.Duration = 350;
    this.Angle = -80;
    this.FeatherDelay = 50;
    this.Direction = Directions.In;
    this.CompletionAnimation = new TurnstileForwardInAnimator();
    this.RunCompletionAnimationFirst = true;
}
public TurnstileFeatherForwardOutAnimator()
{
    this.Duration = 250;
    this.Angle = 50;
    this.FeatherDelay = 50;
    this.Direction = Directions.Out;
    this.HoldSelectedItem = true;
    this.CompletionAnimation = new TurnstileForwardOutAnimator();
}

And you’re done!

LongListSelector Scrolling

OK, I may have lied a little about you being done. The LongListSelector has one final issue when we animate, it doesn’t retain its scroll position. The easiest way to solve this is to sub-class AnimatedBasePage and perform the necessary ‘tweaks’ to the selector in the AnimationsComplete() method. But before I show you the code, you’ll need ‘Linq to Visual Tree’ by Colin Eberhardt. The code file is already included in the demo app. Now you’ve got the necessary code, you can add the AnimationsComplete() method to your newly created page class:

public class TransitionPage : AnimatedBasePage
{
    protected override void AnimationsComplete(AnimationType animationType)
    {
        if (animationType == AnimationType.NavigateBackwardIn || animationType == AnimationType.NavigateBackwardOut)
        {
            foreach (LongListSelector listBox in this.Descendants<LongListSelector>())
            {
                listBox.UpdateLayout();

                if (listBox.SelectedItem != null)
                    listBox.ScrollTo(listBox.SelectedItem);
                else
                {
                    object firstObj = listBox.GetItemsInView().Where(i => i != null).FirstOrDefault();

                    if (firstObj != null)
                        listBox.ScrollTo(firstObj);
                }
            }
        }

        base.AnimationsComplete(animationType);
    }
}

This code picks up if the animation is a backward one, and will automatically loop through all of the LongListSelectors (if you have multiple selectors across PivotItems or PanoramaItems they’ll all lose their position) and corrects their position.

Am I actually done now?

Yes, yes you are! It’s been a long road just to add a Feather Turnstile animation to a LongListSelector, but I believe it’s well worth it. The effect looks great and adds a great deal of professionalism to your app.

This concludes the ‘Transitions’ series of blog posts. As always, you can download the sample app here.

Issues

As with all things, there are a few gotchas. The first is the dreaded ‘AG_E_PARSER_BAD_TYPE’ error. This error can occur when you subclass AnimatedBasePage. To this date I still haven’t resolved the issue – it’s very inconsistent and affects some projects but not others. The easiest workaround is to use extension methods and call those from each individual page. It’s far from ideal and a simply hideous hack – but it does work.

The other issue you may get is a page simply refusing to navigate to another. Chances are you’re requesting a navigation too quickly – the page hasn’t finished initialising. The easiest solution in this case is to use the ‘OneShotDispatcherTimer’ from the Kawagoe Toolkit. You can use the timer like so:

OneShotDispatcherTimer timer = new OneShotDispatcherTimer()
{
    Duration = new TimeSpan(0, 0, 1)
};

timer.Fired += (object sender, EventArgs e) => NavigationService.Navigate(new Uri("/NextPage.xaml", UriKind.Relative));
timer.Start();
Posted by Dan in C#, Tutorials, Windows Phone, 0 comments